Configuring Nextcloud
This guide covers all the necessary configurations you must perform within your Nextcloud environment before you deploy the connector application.
To configure your license, refer to the Configuring Your License article.
Note:
The Nextcloud Exchange Connector operates as an external microservice (daemon). To successfully synchronize calendars and contacts, the connector must securely authenticate and communicate with your Nextcloud instance via its APIs.
Pre-requirements
Email Address Consistency: The email address associated with a user's Nextcloud account must perfectly match their primary SMTP email address in Microsoft Exchange.
Step 1. Create a Nextcloud Service Account
Warning:
While you could use your primary Nextcloud administrator account, it is a strong security best practice to create a dedicated service account specifically for the connector.
Log in to Nextcloud with an administrator account.
Click on your profile picture in the top right corner and select Accounts.
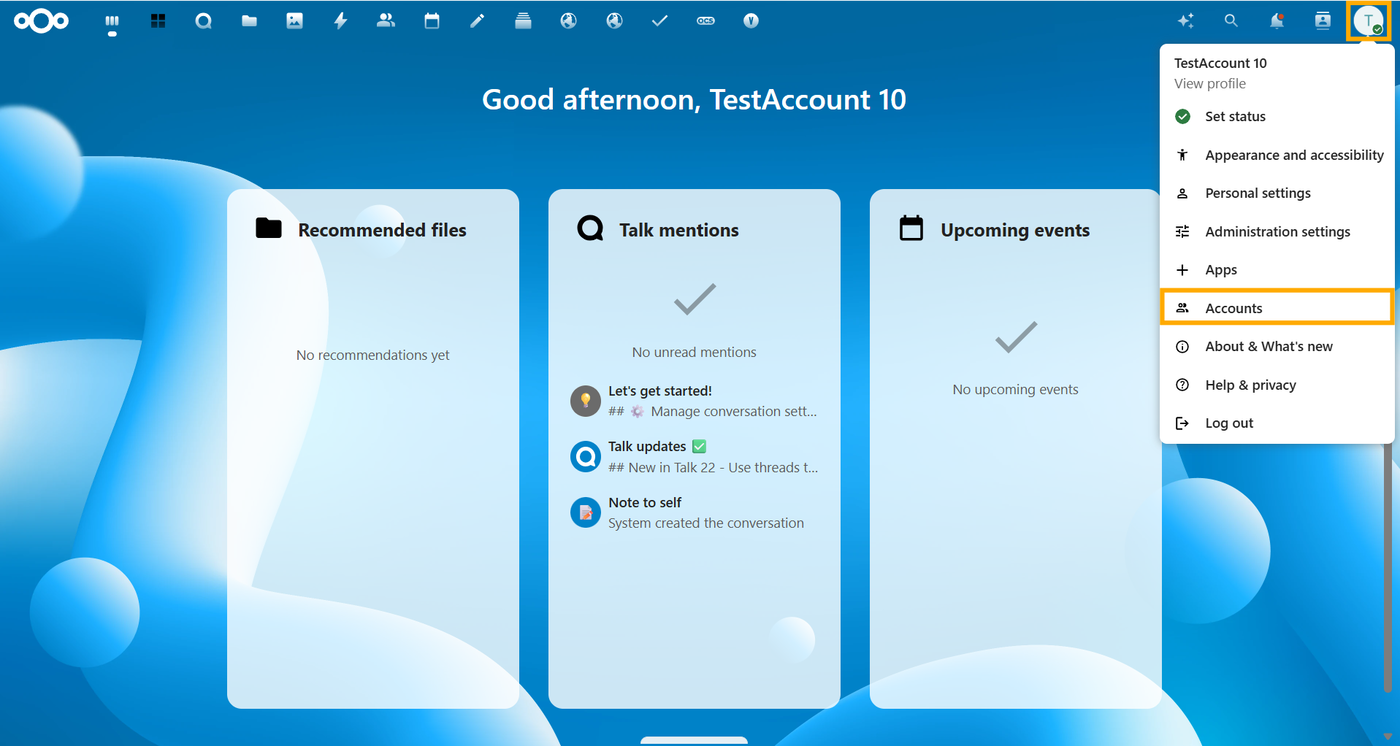
Select New account.
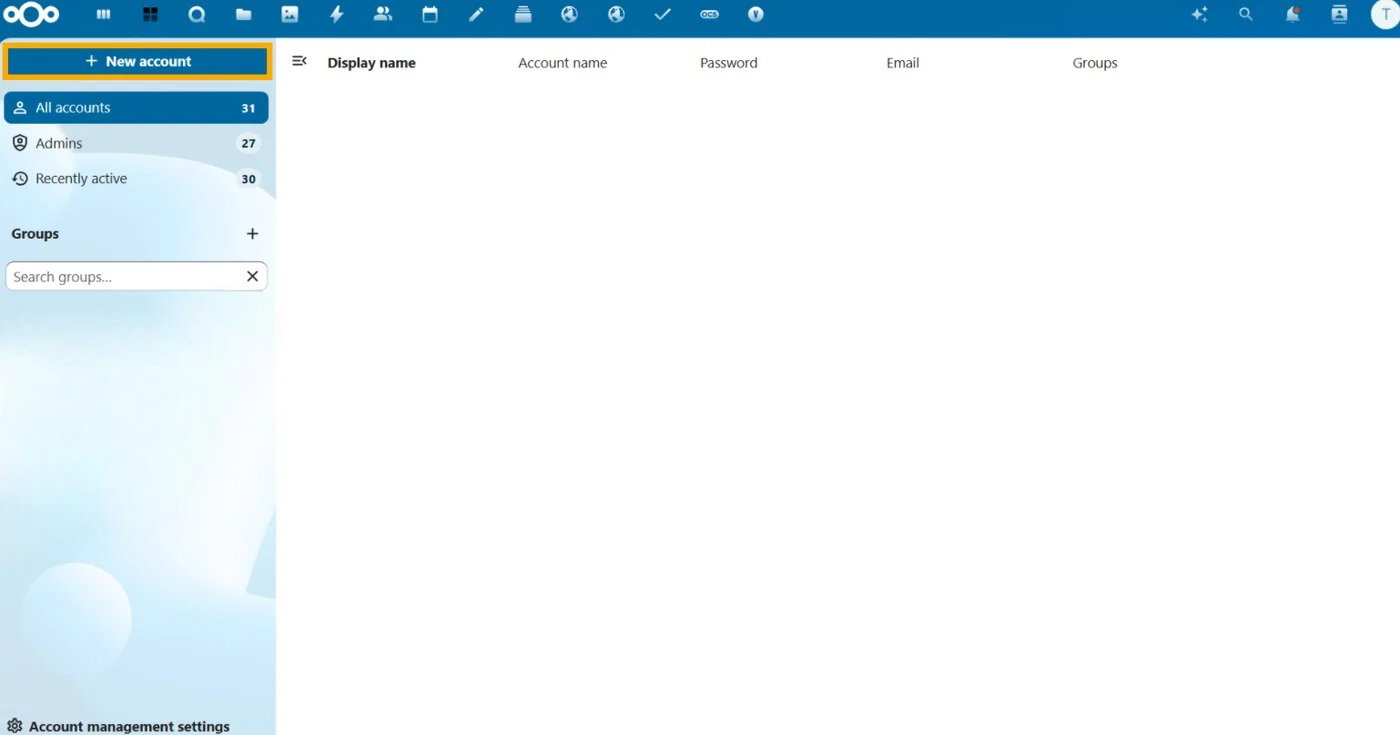
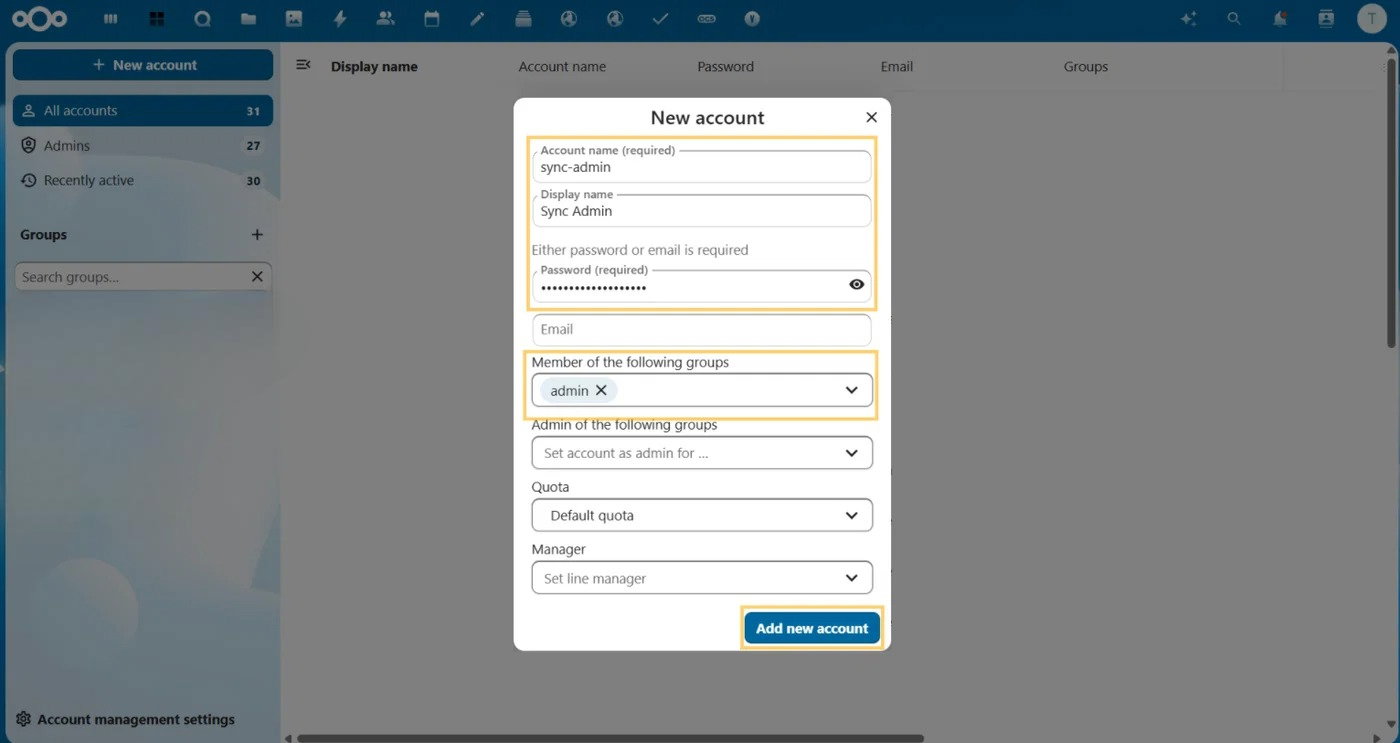
Create a dedicated account (e.g.,
sync-admin) and ensure you assign it to theadmingroup as a member.
Log in as this new
sync-adminuser.Navigate to Personal Settings.

Navigate to Security.
Under Devices & sessions, enter an app name (e.g.,
Exchange Connector) and click Create new app password.
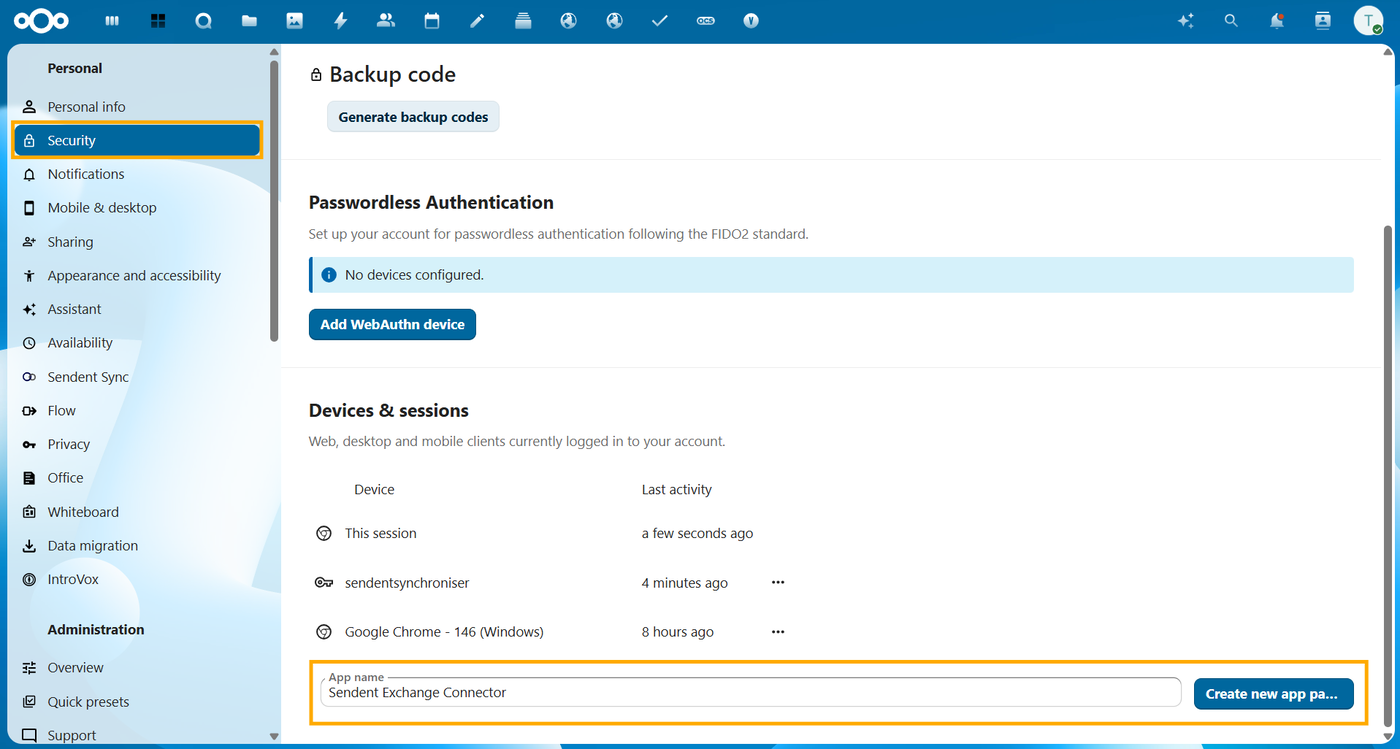
Securely copy the generated credentials. You will use this instead of the standard login password.

Step 2. Install the Sendent Sync App
This Nextcloud application exposes the specific API endpoints the external connector needs to communicate with Nextcloud. It also provides the User Consent UI, allowing individual Nextcloud users to opt-in or opt-out of synchronization.
Log in to your Nextcloud instance as an administrator.
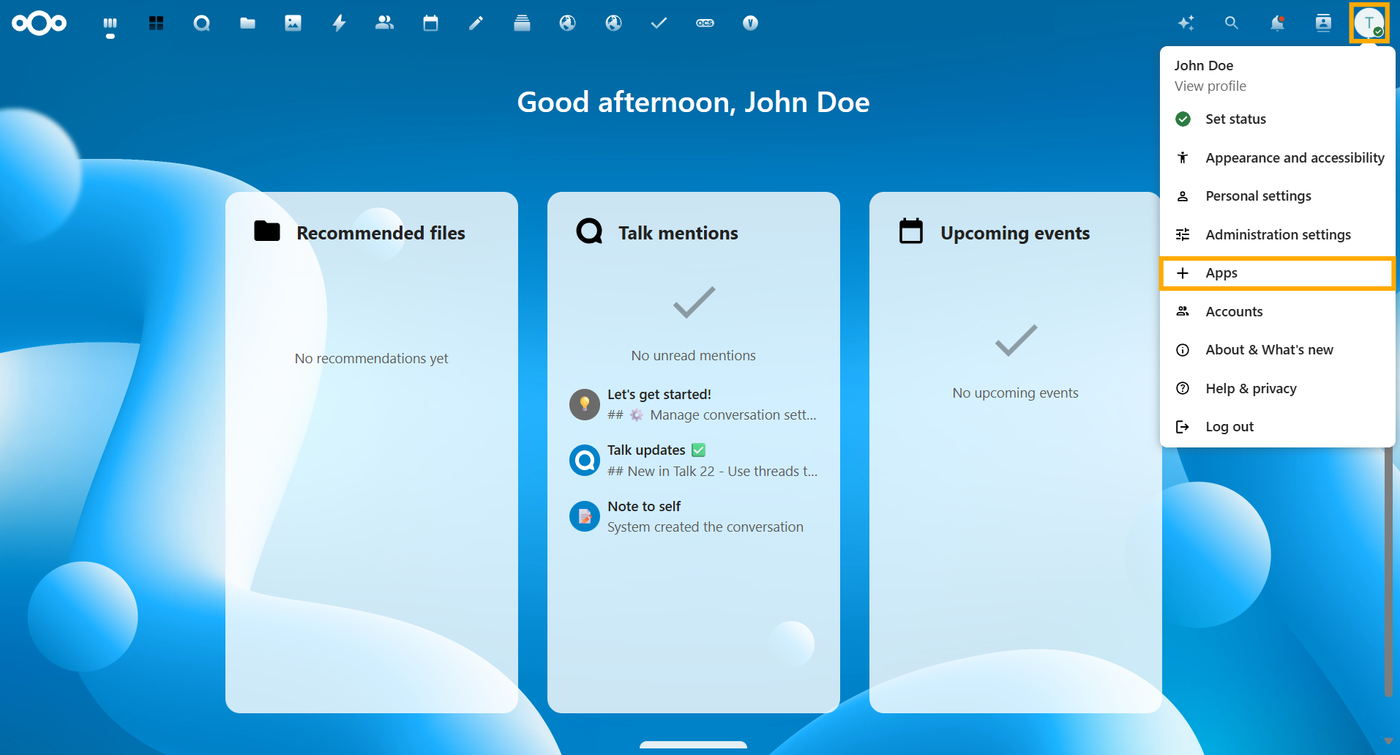
Click on your profile picture in the top right corner and select Apps.
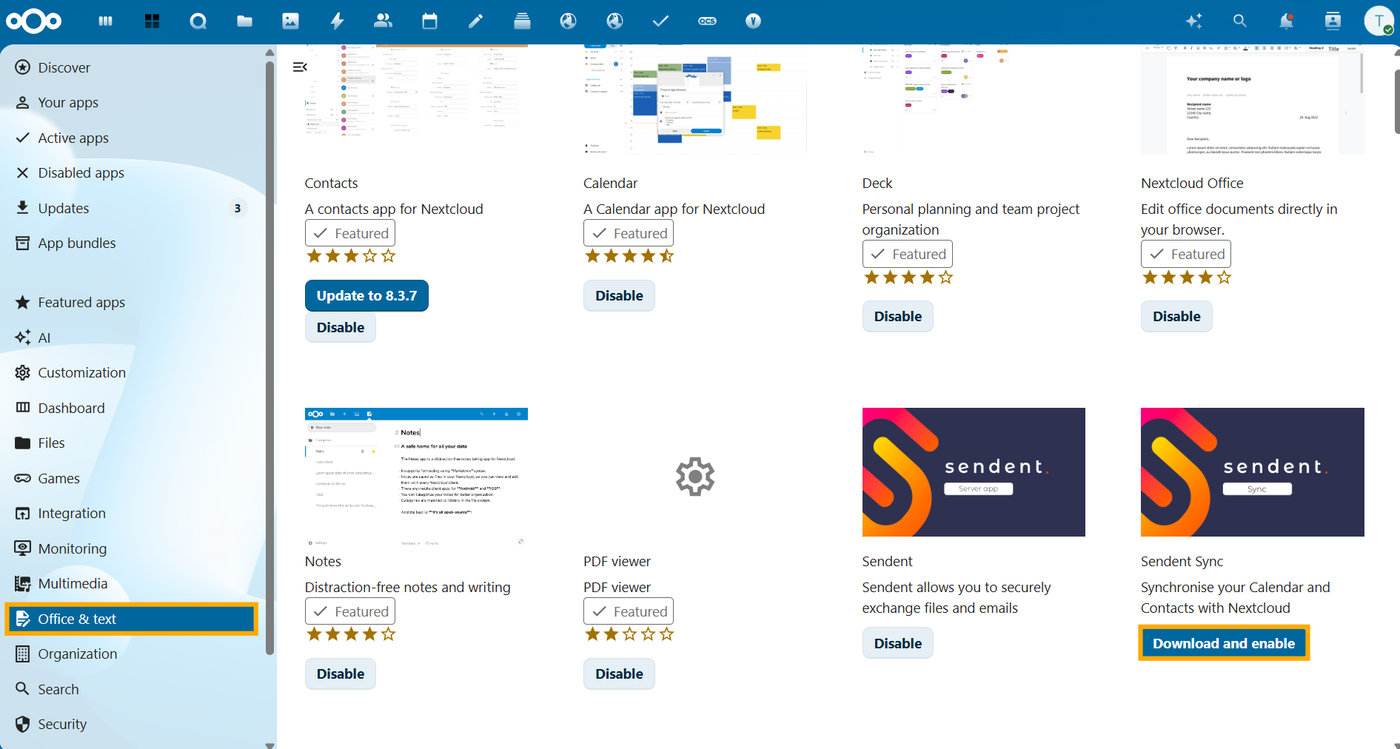
Navigate to the Office & Text category or use the search bar to find the Sendent Exchange Sync app.
Click Download and enable.
Step 3. Configure the Shared Secret
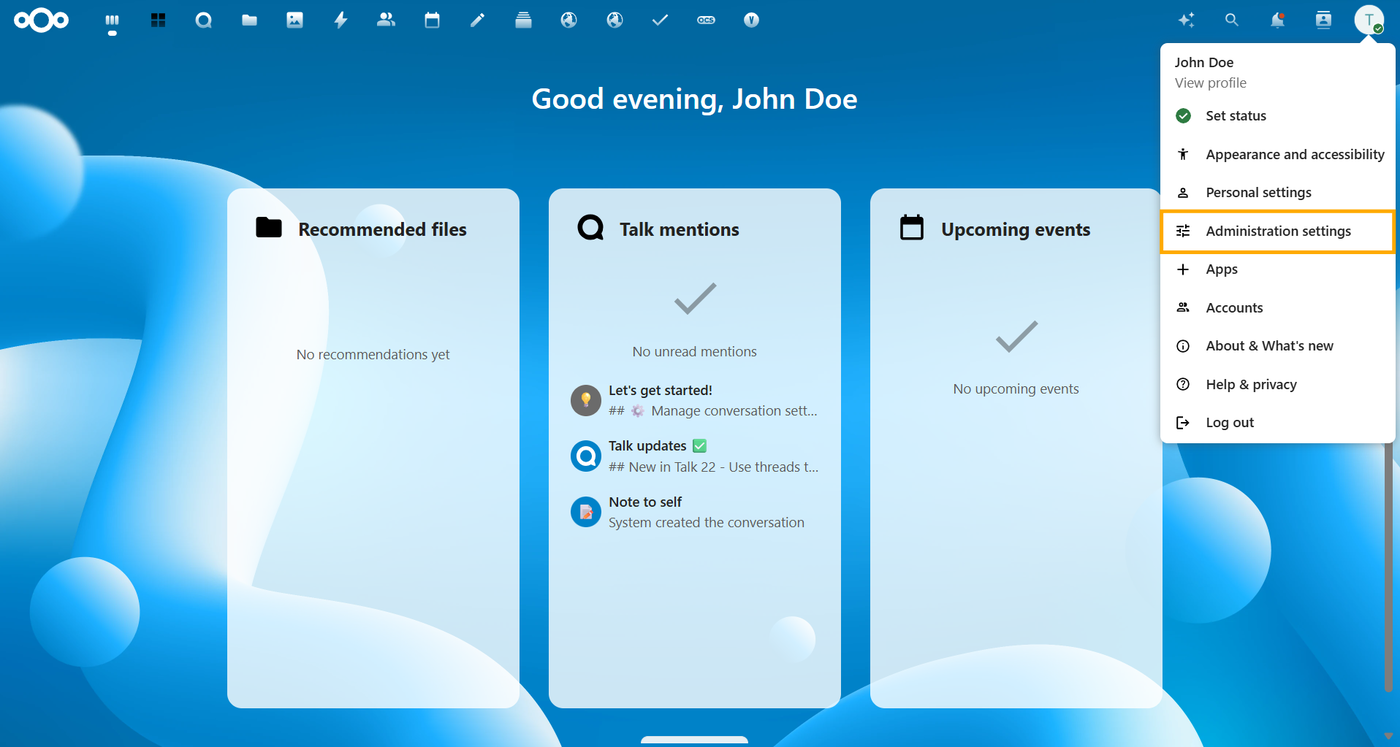
Navigate to your Nextcloud Administration settings.
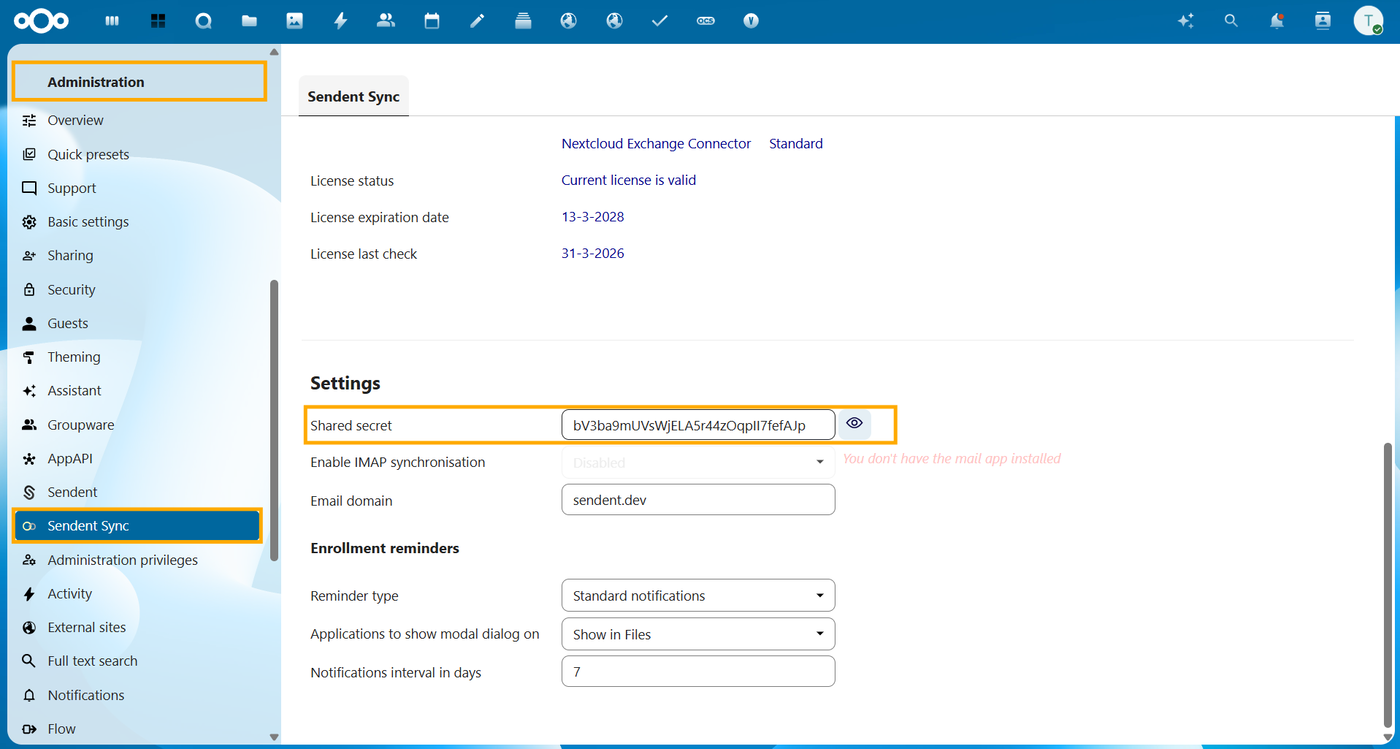
Locate the Sendent Sync configuration section in the left sidebar.
Find the Shared Secret field.
Generate or input a strong, random cryptographic string (e.g., a 32-character alphanumeric string).
Securely copy the Shared Secret. You will use it later on.
Changes will be applied automatically.
Warning: Shared Secret Mismatch
A mismatched shared secret is the most common cause of authentication errors and failed deployments. The exact string you enter in this Nextcloud UI field must perfectly match the SharedSecret value you will configure later in your .env file.
If your generated secret contains a dollar sign ($), remember to escape it as $$ when copying it into your Docker .env file later.
If there is even a single character difference, the connector will not start the synchronization process.
Step 4. Save Credentials for Installation
You have successfully prepared your Nextcloud environment. Keep these credentials secure. Later, when you reach the Installation Guide, you will use these values to build your .env configuration file.
Configuration mapping cheat sheet
When configuring your .env file, map your Nextcloud Base URL, your service account credentials, and your Shared Secret exactly as configured below:
# The URL to your Nextcloud instance (Must include the protocol (http/https) and trailing slash)Service__NextcloudConfiguration__NextcloudBaseUrl=https://cloud.example.com/ # The dedicated service account username you created in Step 1Service__NextcloudConfiguration__NextcloudServiceUsername=sync-admin # The generated App Password from Step 1Service__NextcloudConfiguration__NextcloudServicePassword=your_generated_app_password # The exact secret string configured in the Nextcloud Admin UI in Step 3Service__NextcloudConfiguration__SharedSecret="your_secure_shared_secret_string"Sendent Sync app settings
Beyond the core security configurations, the Sendent Sync app provides several UI parameters that dictate how your users interact with the consent flow and whether IMAP synchronization is offered.

While still in the Sendent Sync section of your Nextcloud Administration settings, you can fine-tune the behavior of the application.
Configuration parameters
Setting | Description |
| If enabled, it triggers an additional step in the consent flow to configure Nextcloud Mail. If Autodiscover is set up on your Exchange server, Nextcloud Mail configures automatically. |
| If your users have multiple email aliases, define your primary domain here (e.g., |
| Determines how the system prompts users to enable synchronization. Supported values: Modal Dialog (popup overlay), Standard notifications (Nextcloud bell icon), or both. |
| Scopes the Modal Dialog visibility. You can restrict the pop-up to specific apps (e.g., Calendar or Contacts) or display it globally across the platform. |
| Defines the cooldown period. If a user dismisses the prompt, the system will wait this number of days before triggering the reminder again. |