Granting User Access (Consent Flow)
In order for your Microsoft Outlook meetings and contacts to automatically appear in your Nextcloud (and vice versa), the system needs your explicit permission. The synchronization will not touch your personal data until you click a button to authorize it.
Follow these simple steps to grant access and enable the synchronization.
Step 1. Log in to your Nextcloud account
Open your web browser and go to your company's Nextcloud portal.
Enter your username and password to log in.
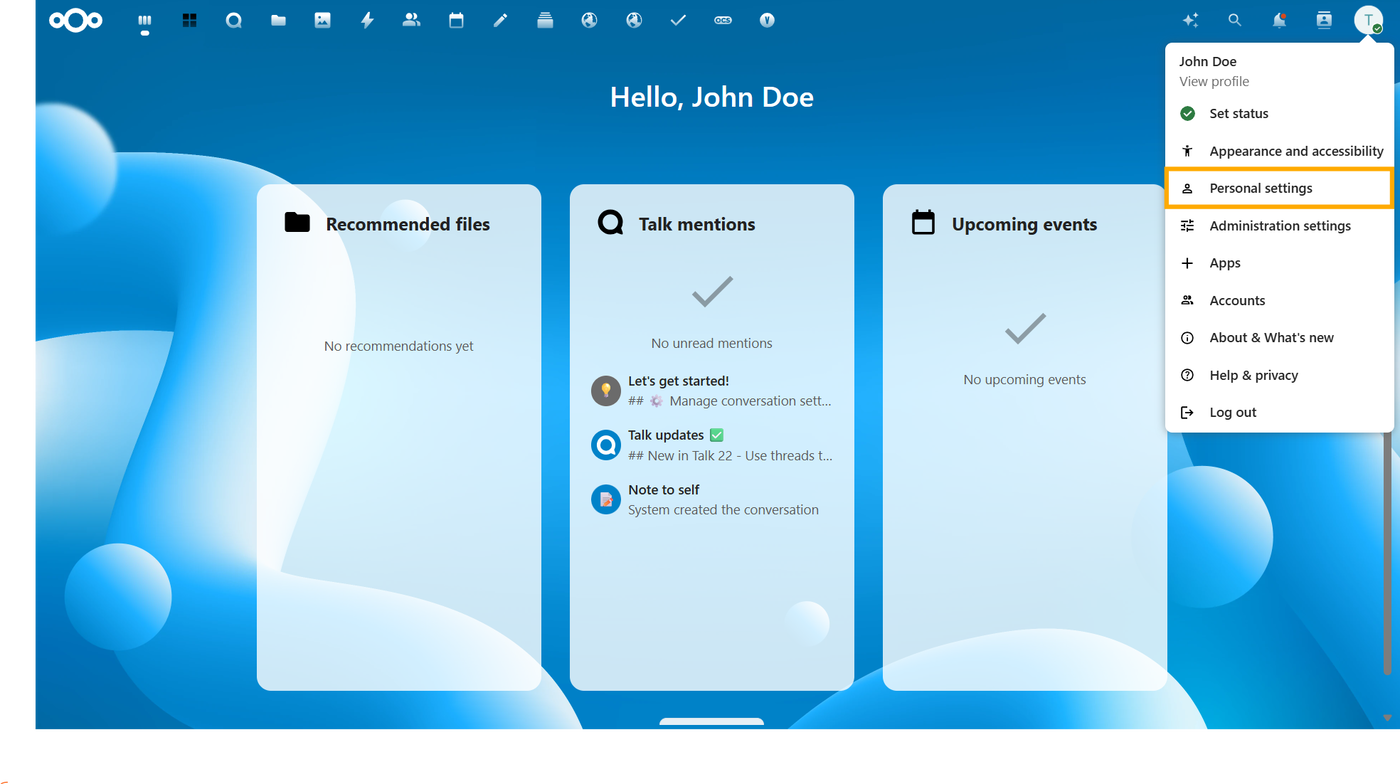
Step 2. Navigate to your Personal Settings
Look at the top right corner of your screen and click on your Profile Picture (or your initials).
From the dropdown menu, select
Personal settings.
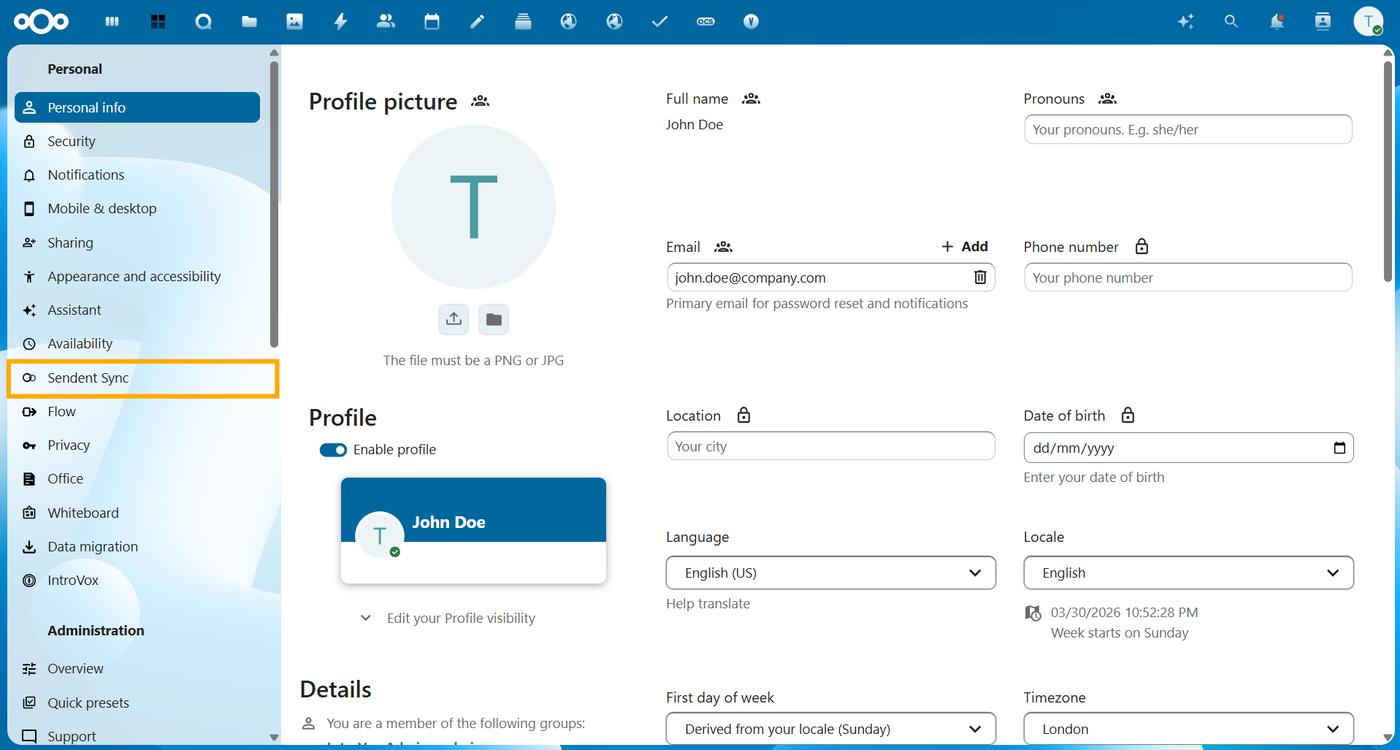
Step 3. Locate the Exchange Sync section
Look at the left-hand sidebar menu.
Scroll down until you see the Sendent Sync section and click on it.
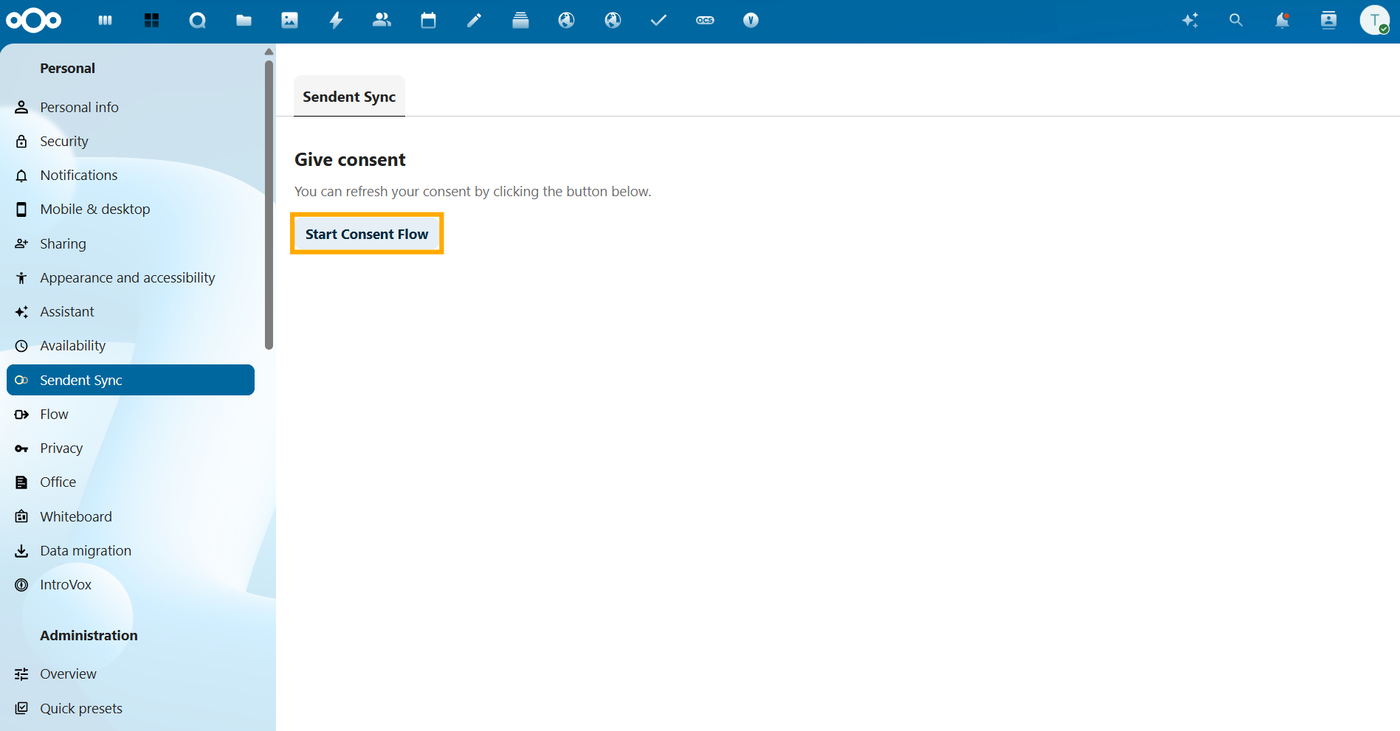
Step 4. Grant Access / Enable Synchronization
On the synchronization page, look for the button labeled Start Consent Flow.
Click the button.
Click on the appeared Give access button to grant the necessary permissions.
Note: The process is completely seamless. You do not need to type in your Microsoft Outlook password. The system will securely generate the necessary permission tokens in the background.