

Configuring Exchange On-Premise
This guide explains how to configure the Nextcloud Exchange Connector to authenticate with Microsoft Exchange On-Premise environments (Exchange 2016, Exchange 2019).
Note:
Unlike Microsoft 365 Cloud environments that use OAuth app registrations, On-Premise setups rely on dedicated Service Accounts. To securely synchronize calendars and contacts without knowing every user's personal password, the connector utilizes the ApplicationImpersonation role in Exchange.
Pre-requirements
Before you begin configuring the Exchange Server, ensure you have the following:
Administrative Access: You must have access to the Exchange Admin Center (EAC) with an account that holds "Organization Management" or "Role Management" permissions.
Exchange Web Services (EWS): EWS must be enabled and externally accessible if your Nextcloud instance is hosted outside your local network.
Step 1. Create Exchange Service Accounts
Why this is needed: You must create dedicated user accounts in your Active Directory/Exchange environment that the connector will use to act as a background daemon.
Open your Active Directory Users and Computers (ADUC) or Exchange Admin Center.
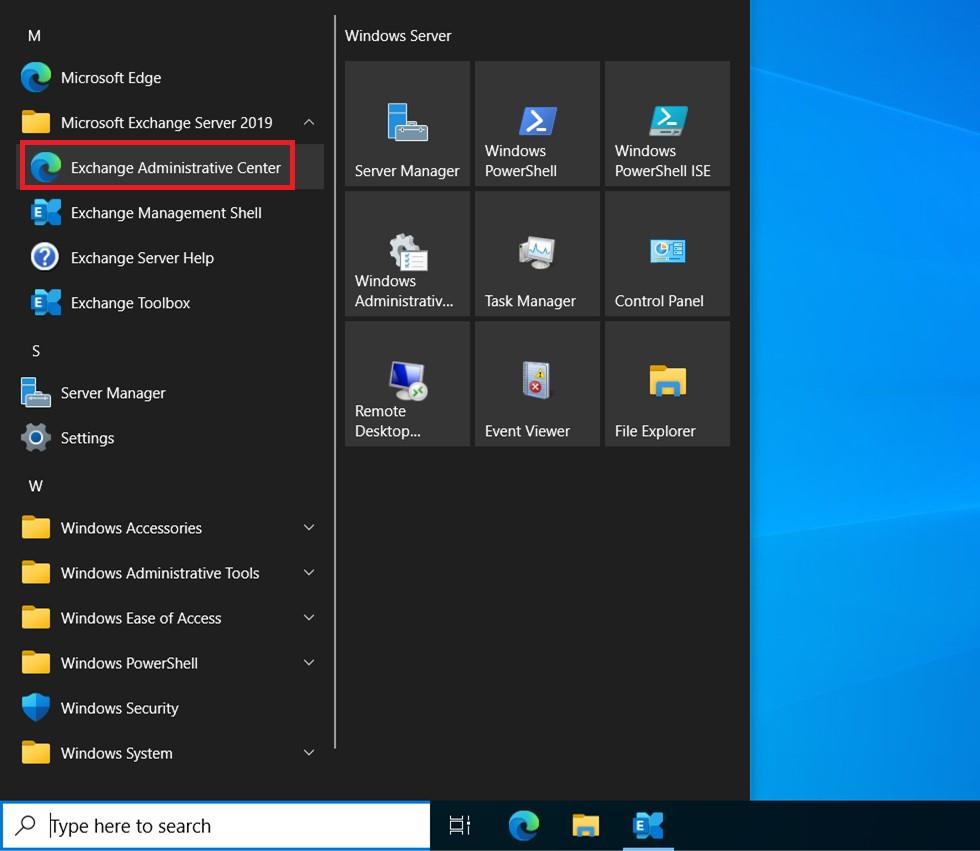
Login as an Administrator.
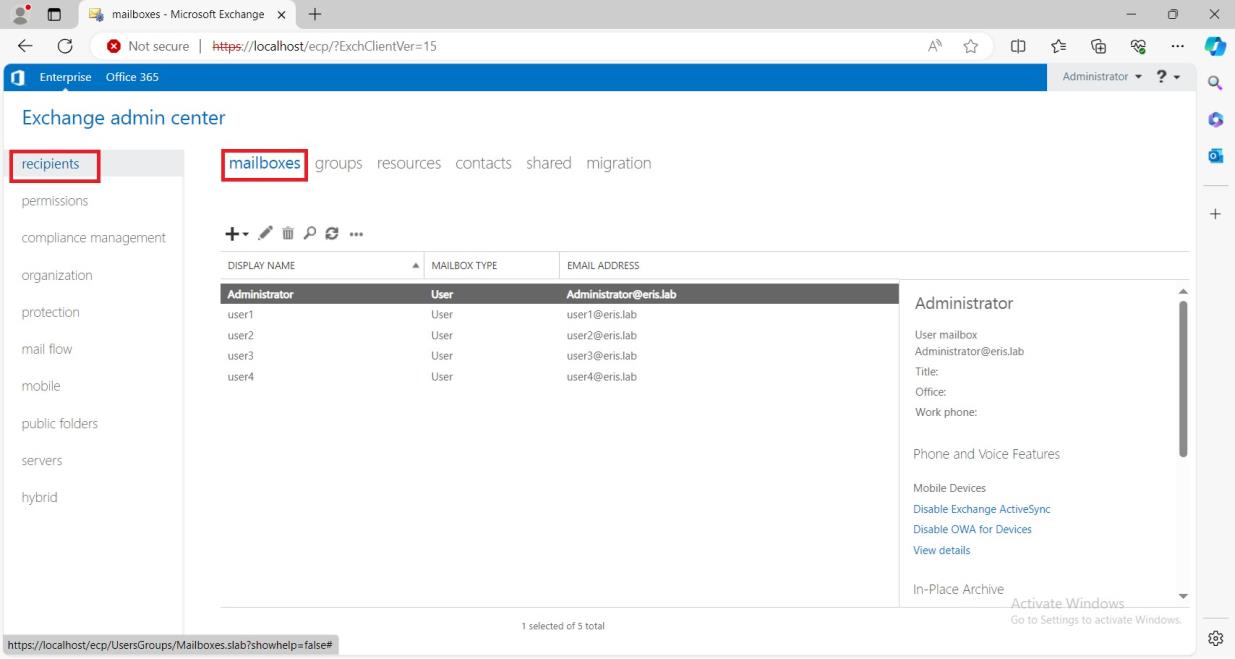
In the left-hand sidebar, select recipients.
Select mailboxes.
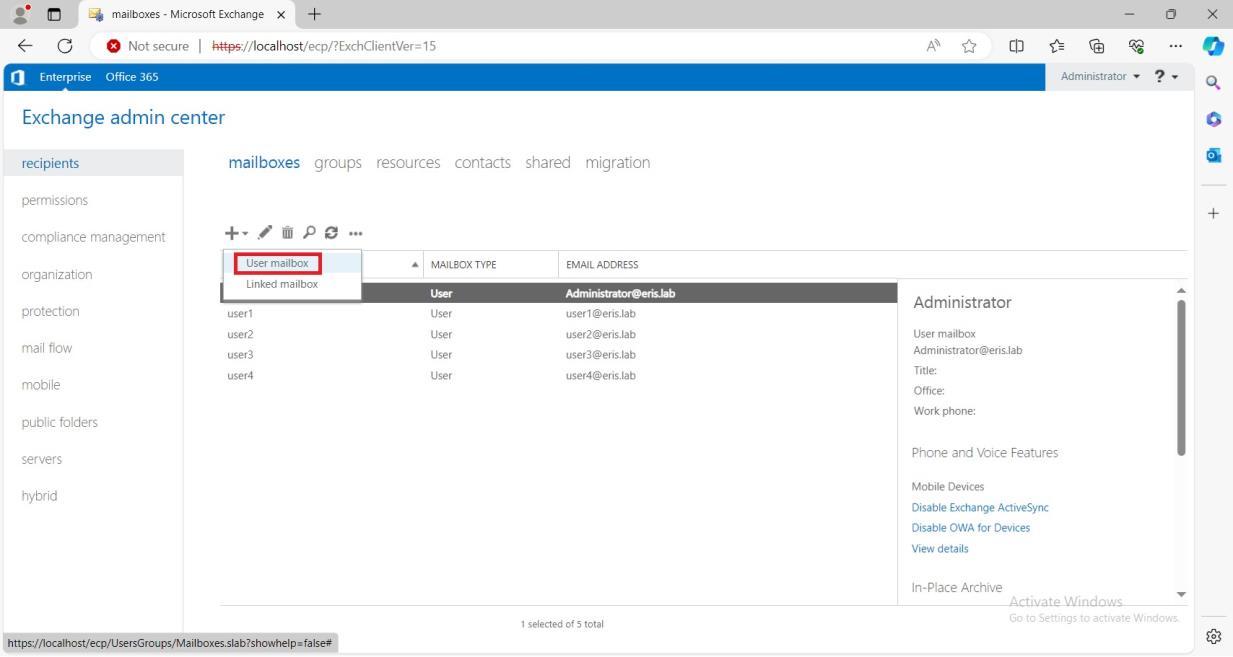
Select '+' → User mailbox.
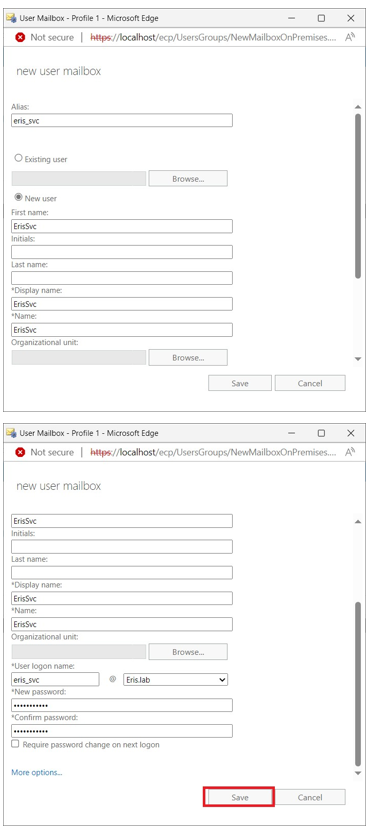
Fill in the required fields and press Save.
Pro Tip: Bypass Exchange Throttling
Microsoft Exchange enforces strict throttling limits on concurrent EWS connections per user account. If you are synchronizing hundreds or thousands of users, a single service account will quickly hit this limit, causing synchronization to bottleneck.
We highly recommend creating multiple service accounts (e.g., sync-admin-1, sync-admin-2) from the start. The connector will distribute the load across them automatically.
Step 2. Configure the Impersonation Role Group
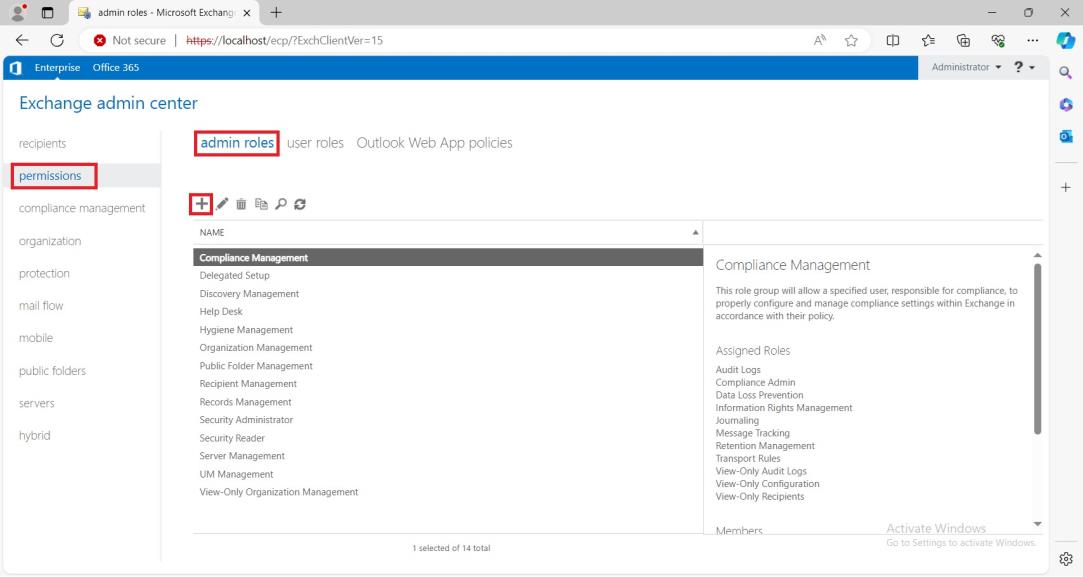
In the left-hand navigation pane, navigate to permissions and select the admin roles tab.
Click the + (Add) icon to create a new role group.
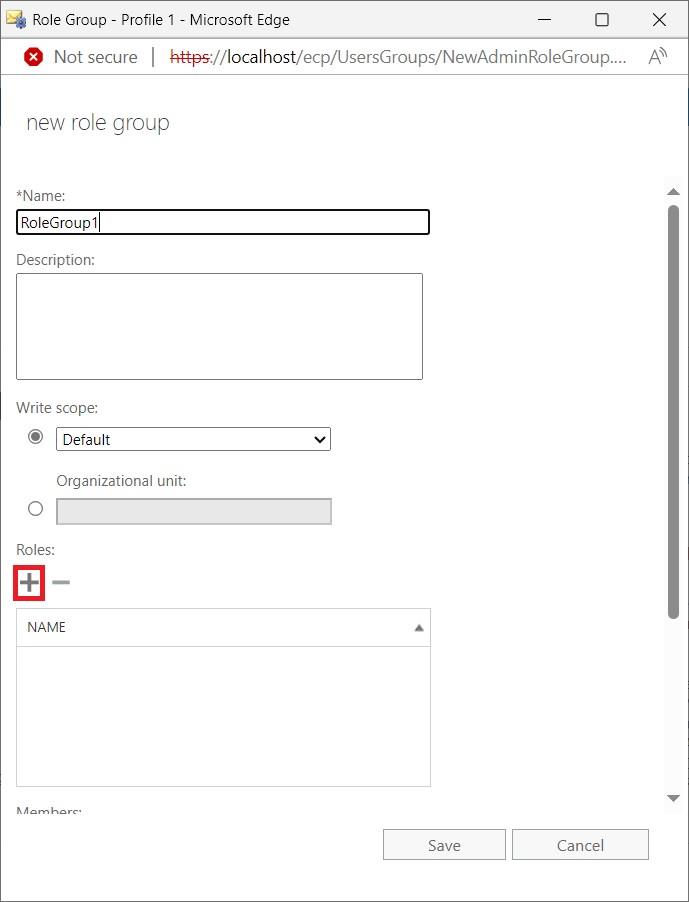
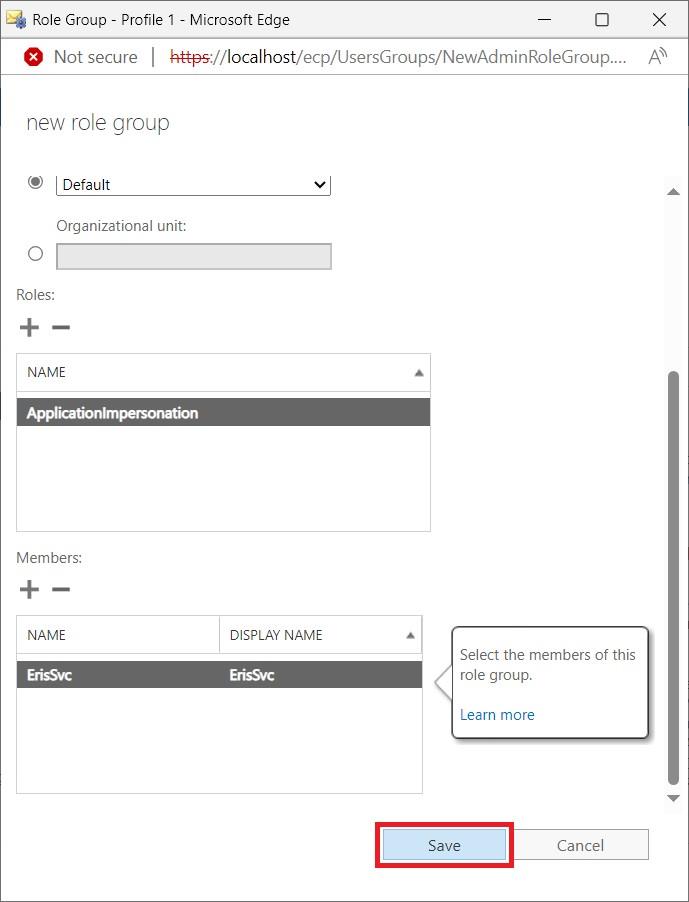
In the new window, enter a descriptive Name (e.g.,
Nextcloud Sync Impersonation) and an optional description.Scroll down to the Roles section and click the + (Add) icon.
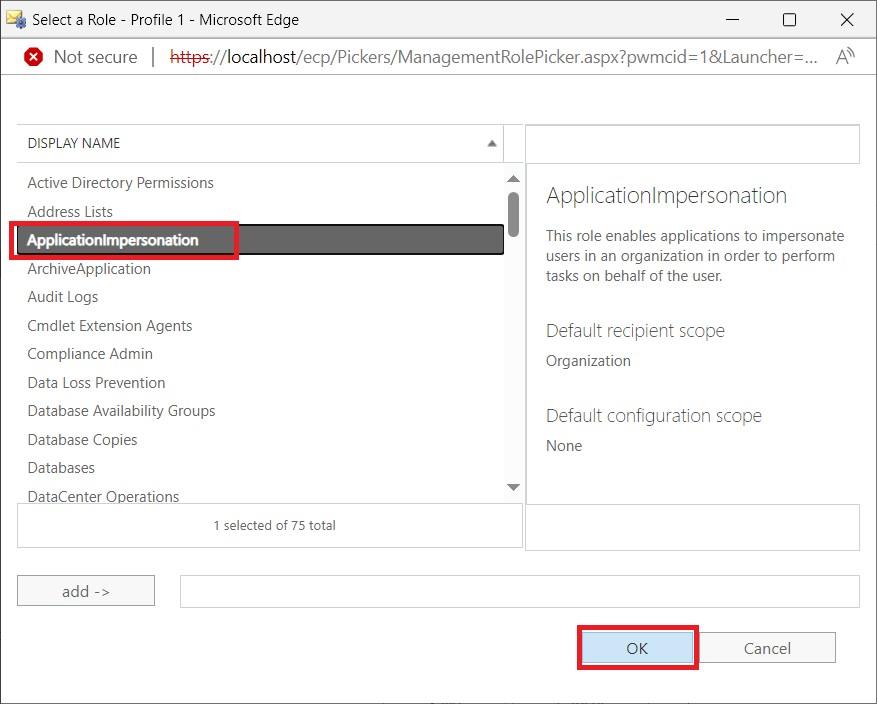
In the Select a Role window, select ApplicationImpersonation, click add ->, and then click OK.
Step 3. Assign Service Accounts to the Role Group
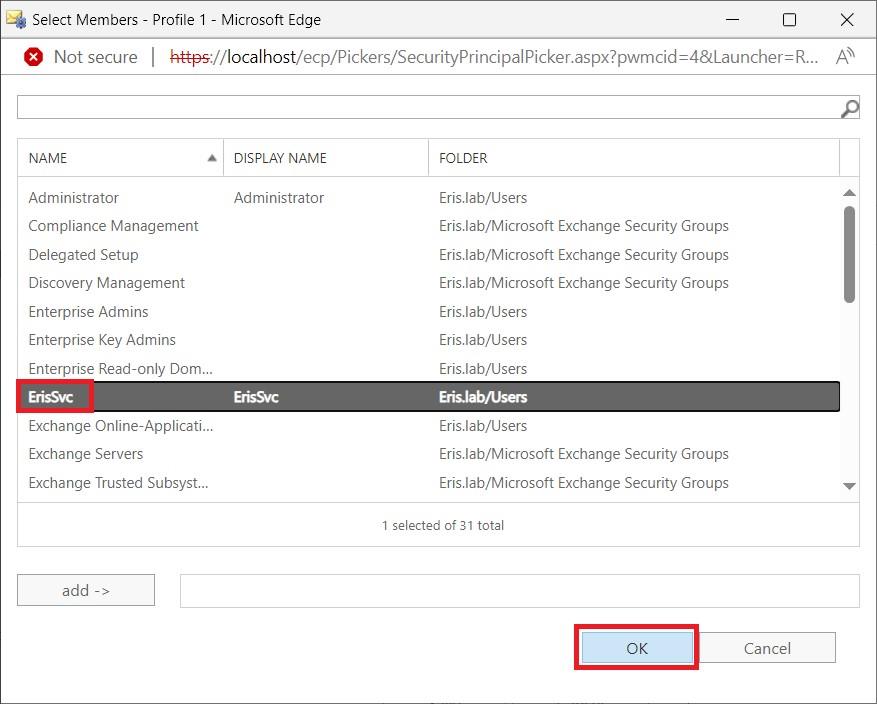
Still inside your newly created Role Group window, scroll down to the Members section.
Click the + (Add) icon.
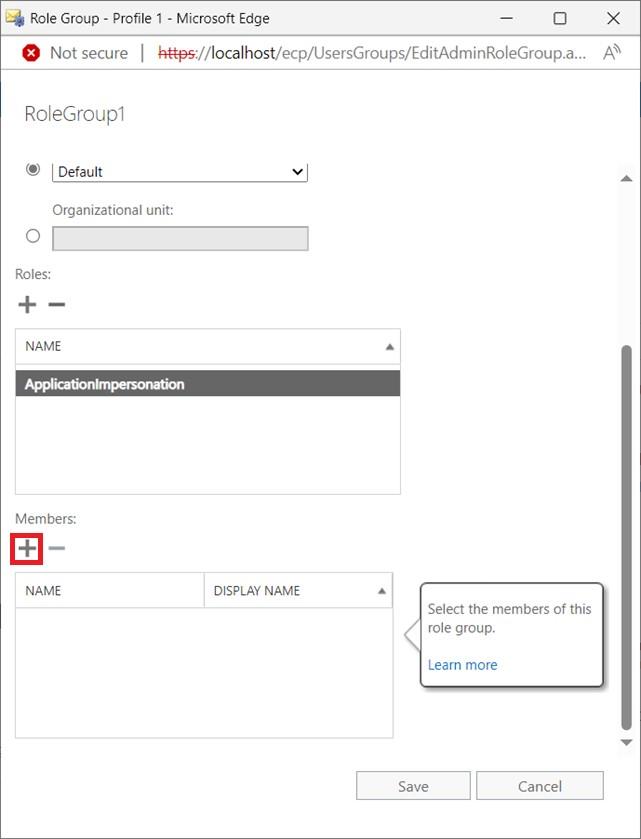
Search for and select the service accounts you created in Step 1.
Click add -> and then click OK.
Click Save to create the Role Group and apply the permissions. It may take a few minutes for the permissions to fully propagate across your Exchange environment.
Step 4. Save Credentials for Installation
You have successfully prepared your Exchange environment. Put them on an EWS on-premise sync client in your .env file.
Configuration mapping cheat sheet
Graph does not apply to on-premise Exchange. Use Provider=Ews.
Do not use EventSyncClients__*__Settings__ExchangeOnPremUrl or ExchangeOnPremDomain. Those are the old global names. On the client the keys are OnPremUrl and OnPremDomain.
Kerberos (ExchangeType=2):
EventSyncClients__0__Identifier=ewsEventSyncClients__0__Provider=EwsEventSyncClients__0__Settings__ExchangeType=2EventSyncClients__0__Settings__OnPremUrl=https://exchange.example.com/EWS/Exchange.asmxEventSyncClients__0__Settings__OnPremDomain=your_domain_hereEventSyncClients__0__Settings__UserName=sendent-sync-1EventSyncClients__0__Settings__Password=SecurePassword1! EventSyncClients__1__Identifier=davEventSyncClients__1__Provider=DavEventSyncClients__1__Settings__BaseUrl=https://cloud.example.com/EventSyncClients__1__Settings__ServiceUsername=sync-adminEventSyncClients__1__Settings__ServicePassword=your-passwordEventSyncClients__1__Settings__SharedSecret=your-shared-secret EventSync__Pairs__0__SourceClientId=ewsEventSync__Pairs__0__TargetClientId=davEventSync__CalendarPriorityOrder__0=ewsEventSync__CalendarPriorityOrder__1=davBasic Auth (ExchangeType=3) uses the same client keys as Kerberos.
ADFS (ExchangeType=4) uses OnPremUrl, OnPremAdfsAuthorityUrl, ClientId, and ClientSecret instead of UserName / Password / OnPremDomain.
admins.json is optional. Use it only if you created several service accounts for throttling. The first account can stay on the client above.