Configuring Microsoft 365 (Exchange Online via EWS)
This guide explains how to configure Exchange Web Services (EWS) authentication for Exchange Online (Microsoft 365) to support the Nextcloud Exchange Connector workflow.
Note:
Unlike On-Premise environments that use Service Accounts with Kerberos or Basic Authentication, Microsoft 365 requires modern OAuth 2.0 app-only authentication. To achieve this, you must register the connector as an application in Microsoft Entra ID (formerly Azure AD).
Pre-requirements
Before you begin the app registration process, ensure you have the following:
Administrative Access: You must have Global Administrator or Application Administrator privileges in your Microsoft Entra ID tenant to grant organizational consent for the required API permissions.
Active Microsoft 365 Tenant: An active Microsoft 365 subscription with Exchange Online mailboxes provisioned.
Step 1. Register the Application in Microsoft Entra
Why this is needed: Registering the application generates a unique Application (client) ID and Directory (tenant) ID. These identifiers act as the username and domain for your connector to securely communicate with the Microsoft 365 cloud.
Open a browser and log in to the Microsoft Entra admin center.
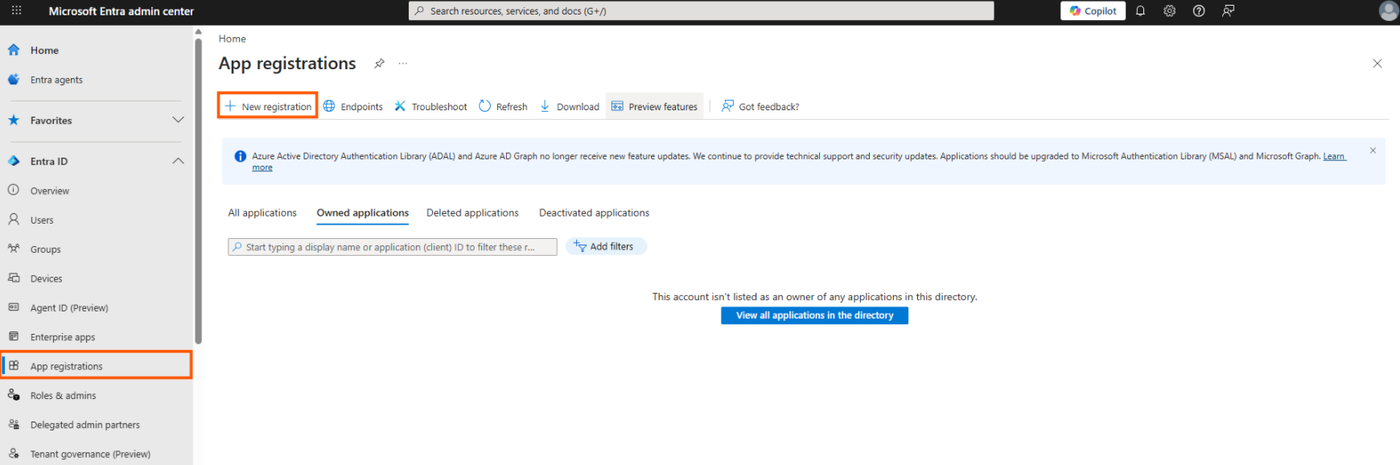
Navigate to Entra ID > App registrations (located in the left sidebar).
Click New registration at the top of the page.
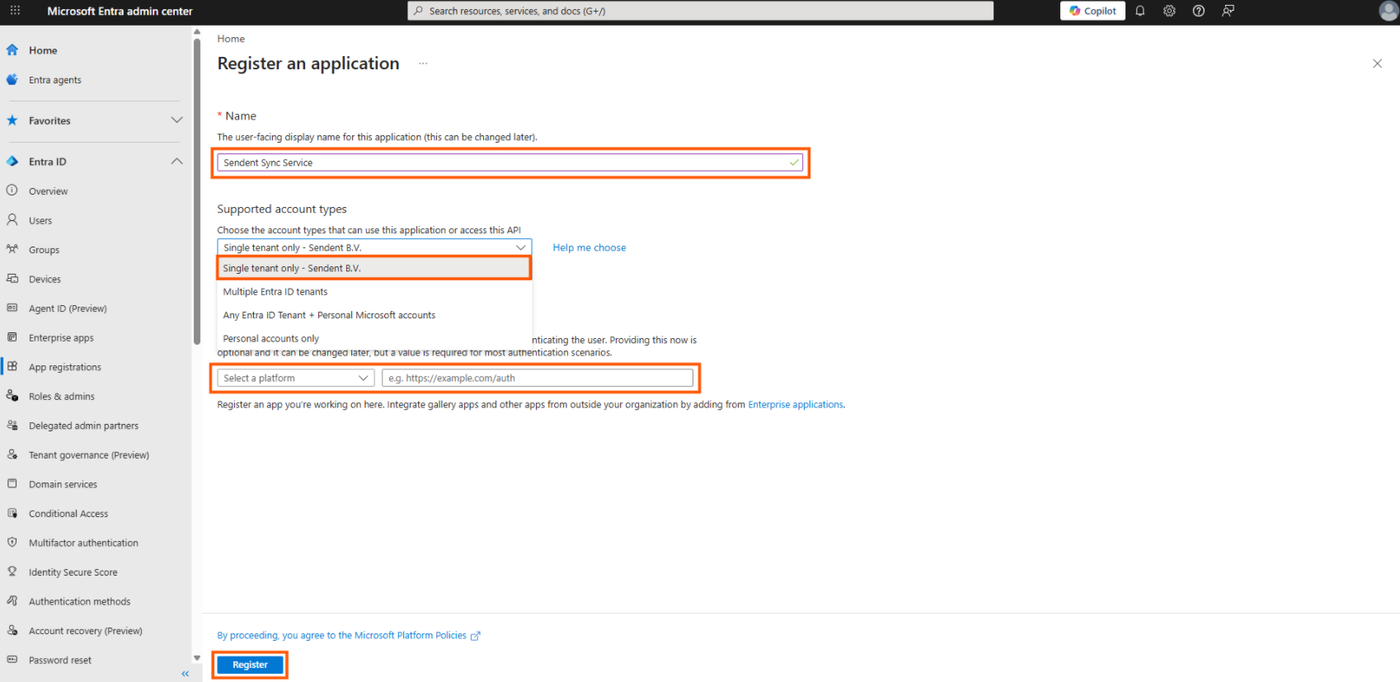
Fill out the registration form. with the following parameters:
Set Name to a friendly name for your app.
Set Supported account types to the Single Tenant Only.
Redirect URI: Leave this field empty.
Click Register.
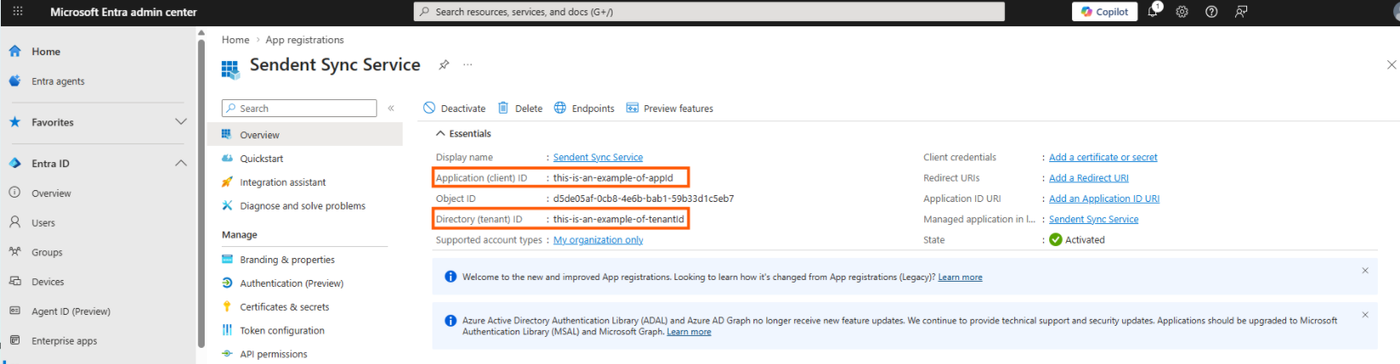
Once the app is created, you will be redirected to the Overview page. Copy and save the following identifiers; you will need them later:
Application (client) ID(This will be your AppId)Directory (tenant) ID(This will be your TenantId)
Step 2. Configure Permissions for App-only Access
Why this is needed: The connector operates as a background daemon (server-to-server) without a signed-in user present. It requires "Application permissions" with the full_access_as_app role to impersonate users and sync their calendars and contacts.
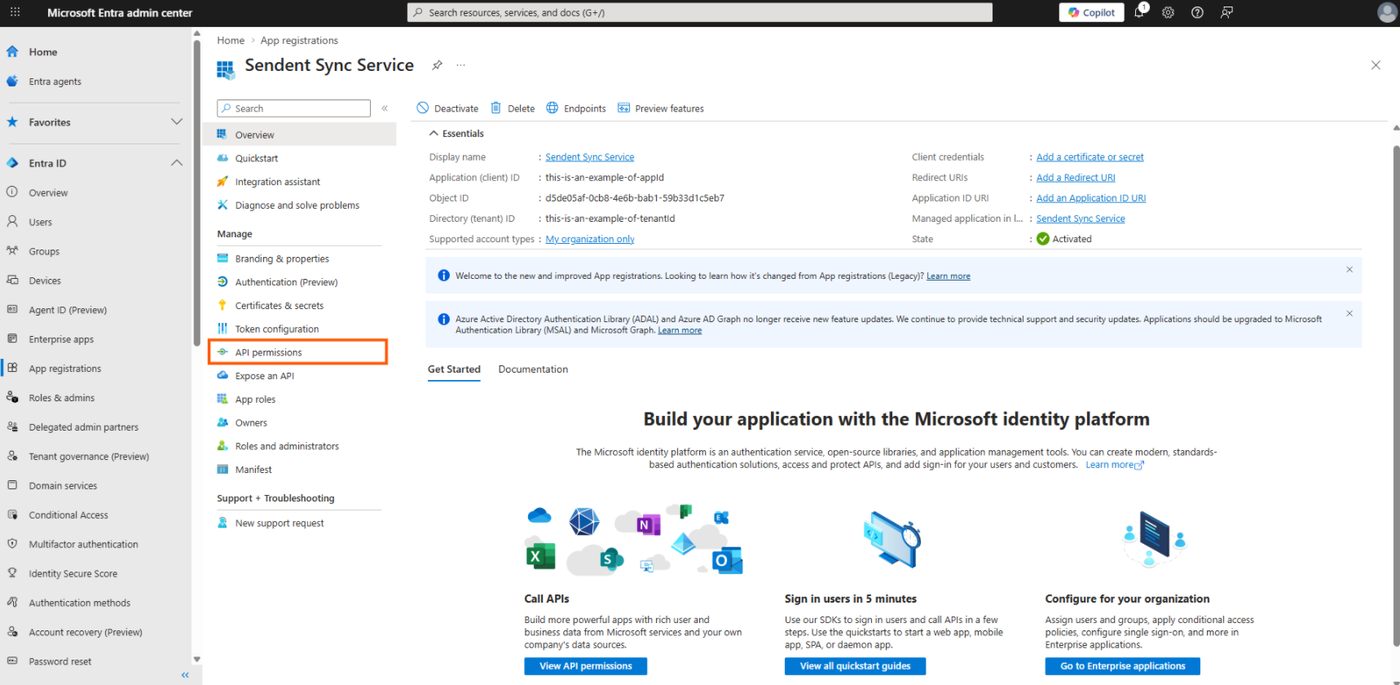
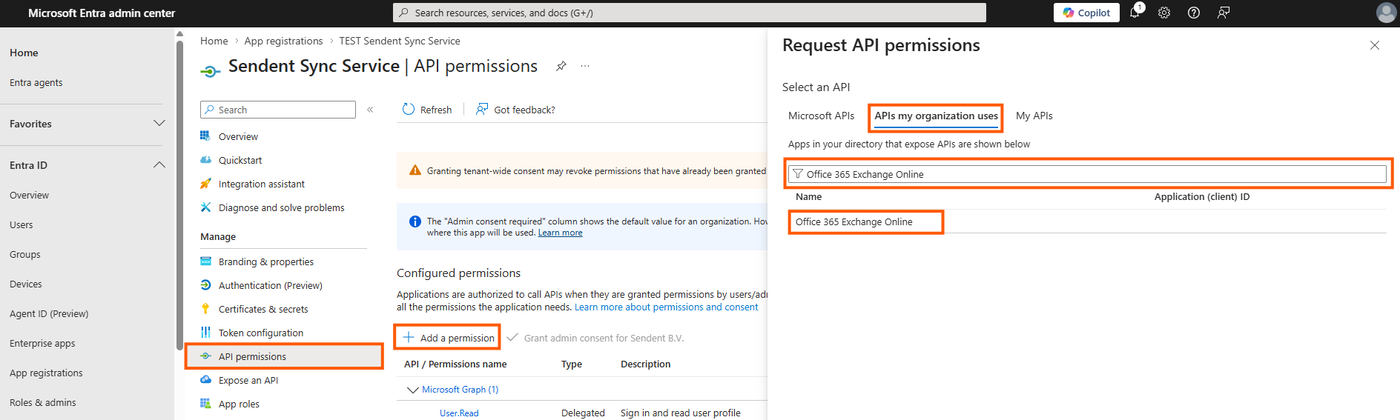
In your app registration menu, navigate to Manage > API permissions.
Click Add a permission > APIs my organization uses and search for Office 365 Exchange Online.
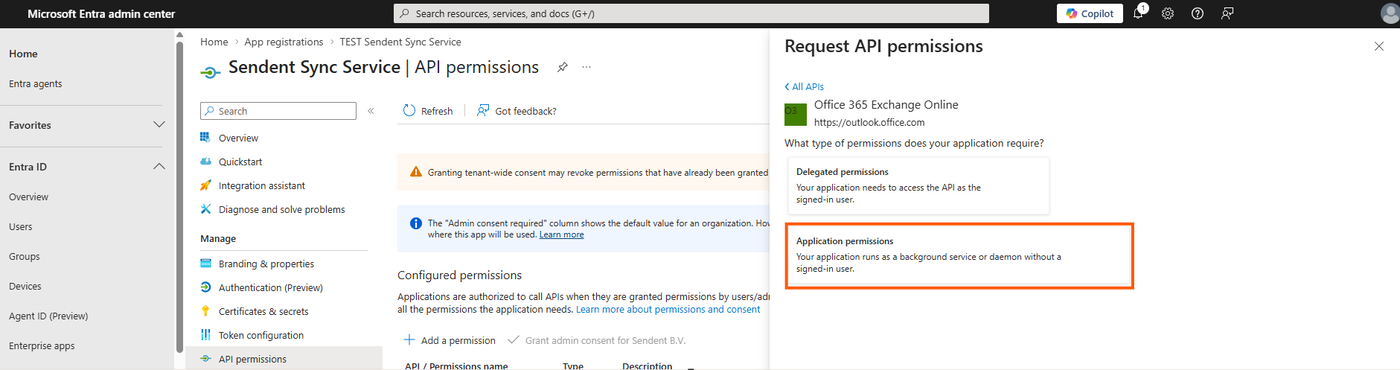
Select Application permissions.
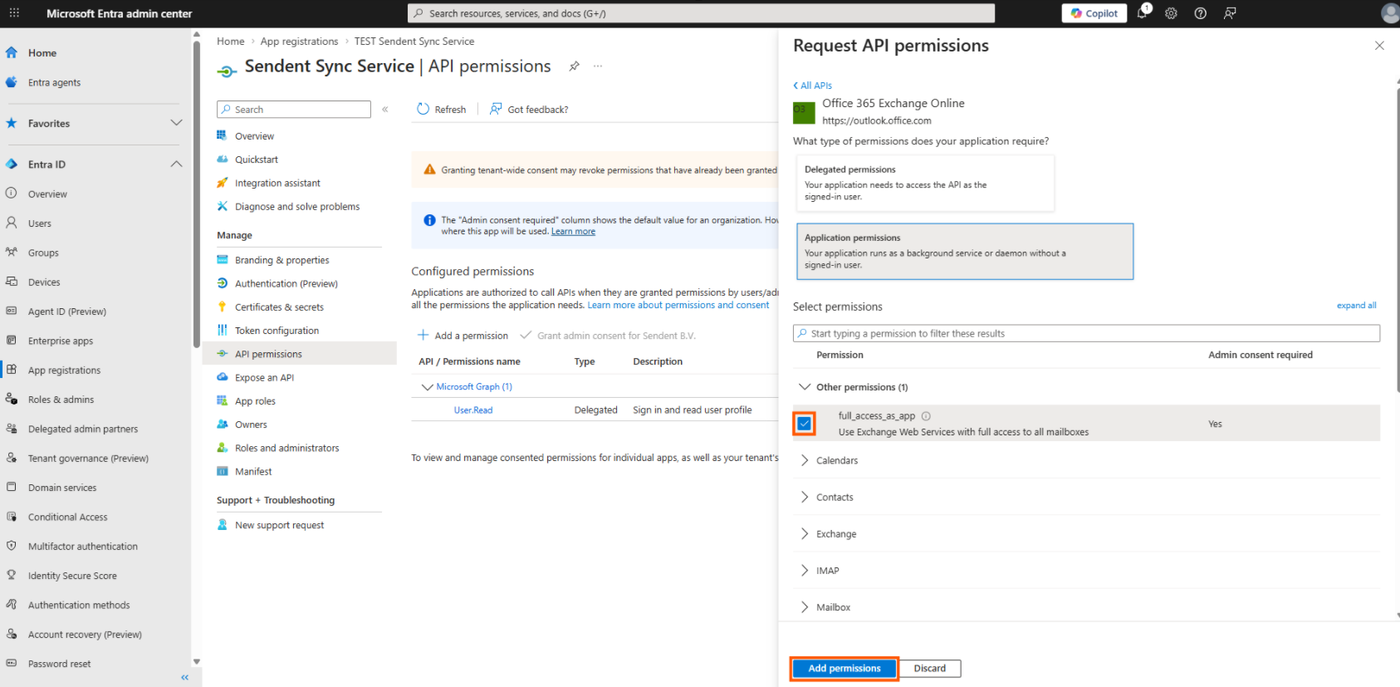
Check the box
full_access_as_appand click Add permissions.
Warning: Grant Admin Consent
Adding the permission is not enough. You must click the Grant admin consent for [Your Organization] button on the API permissions page and accept the prompt.
If the status does not show a green checkmark, Microsoft 365 will deny all synchronization requests from the connector.
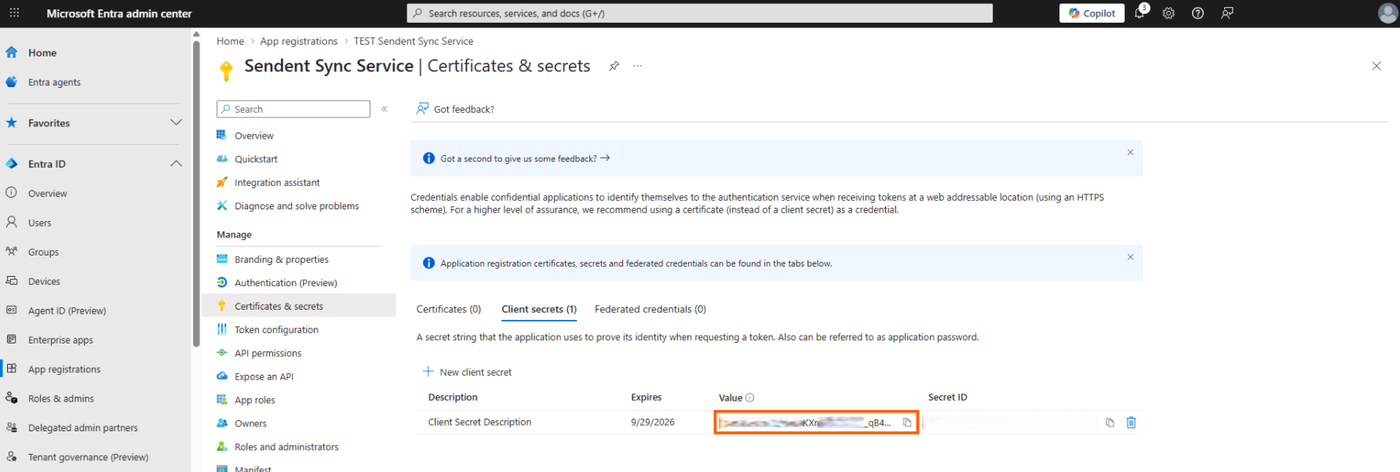
Step 3. Create a Client Secret
Why this is needed: The Client Secret acts as the password for your newly registered application, proving its identity to Microsoft Entra ID when requesting an access token.
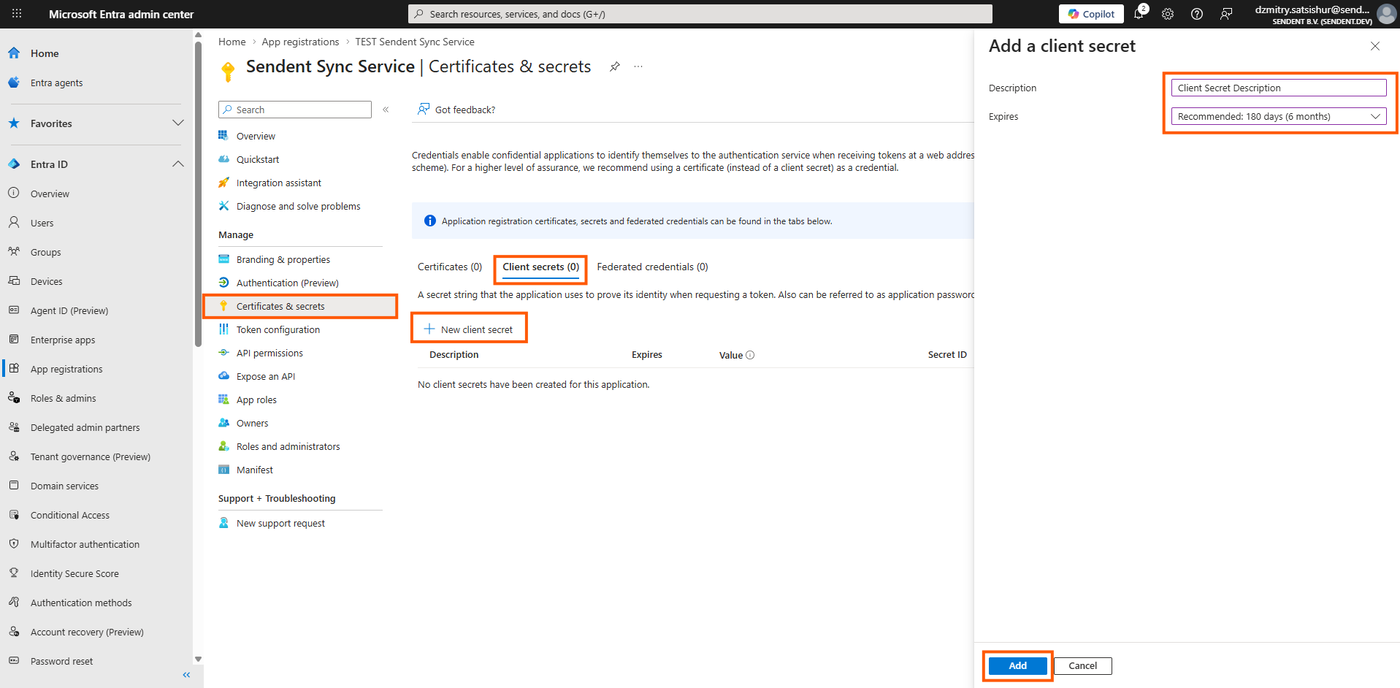
Navigate to Manage > Certificates & secrets.
Under the Client secrets tab, click New client secret.
Add a description and choose an expiration period, then click Add.
Immediately copy the
Valueof the client secret. You will not be able to view it again once you leave the page.
Step 4. Save Credentials for Installation
You have successfully generated the required Microsoft 365 access keys. Keep these values secure. Later, when you reach the Installation Guide, you will use these keys to build your configuration files.
Configuration mapping cheat sheet
1. The .env Configuration File
When configuring your .env file, ensure your Exchange Type is set to Cloud (1), and map your saved Tenant ID accordingly:
Service__ExchangeConfiguration__ExchangeType=1Service__ExchangeConfiguration__ExchangeTenantId="your-directory-tenant-id-here"2. The admins.json Credentials File
When building your admins.json file inside the exchangeAdmins directory, map your App ID and Client Secret:
[ { "ExchangeType": 1, "AppId": "your-application-client-id-here", "ClientSecret": "your-client-secret-value-here" }]