How to Install Sendent (Cross-Platform) at Organizational Level
When installing the add-in, you have the flexibility to choose between two distribution methods: at the individual level or the organizational level. To learn how to distribute the Sendent for Outlook at an individual level please refer to the user guide here.
Distribution on the Organizational Level
This distribution method enables administrators to deploy the add-in to all users within the organization through the Microsoft 365 admin center. It ensures a consistent setup and is efficient for larger organizations.
1. Log into your Microsoft 365 Admin Center as an administrator here: https://admin.microsoft.com.
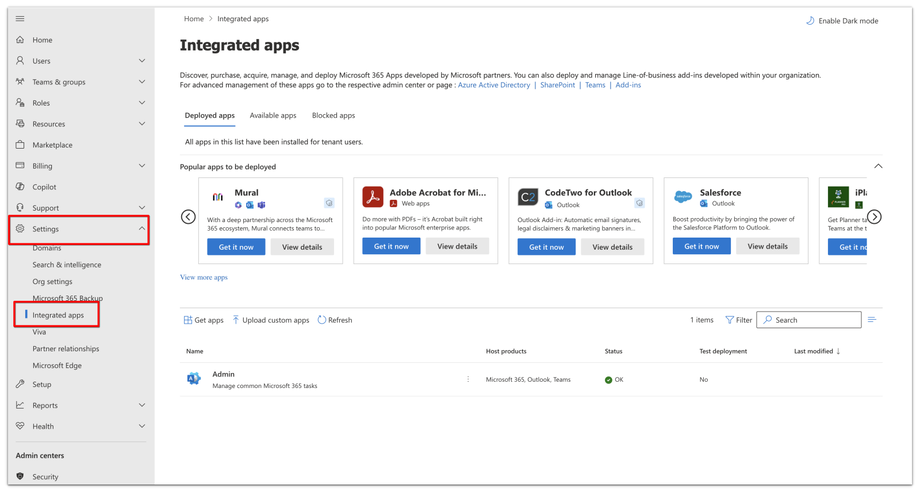
2. From the sidebar navigation menu, click Settings and the Integrated app option.
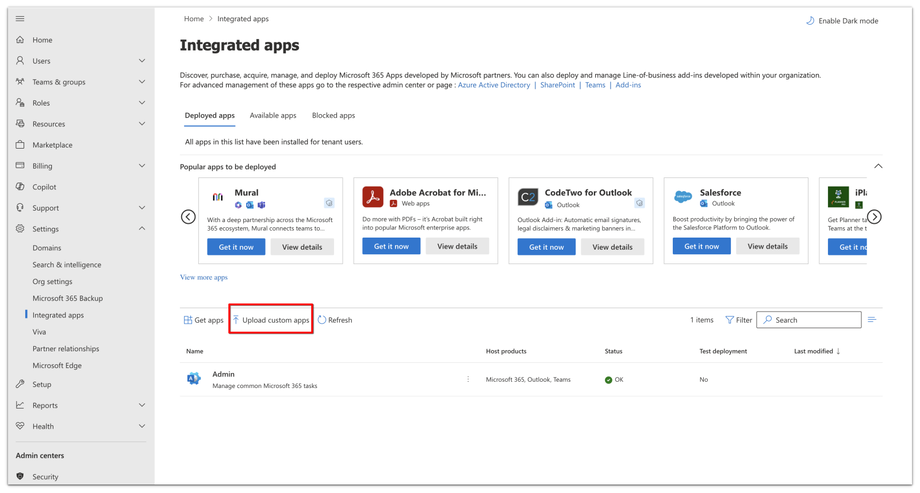
3. From the integrated apps page, click the Upload Custom Apps button.
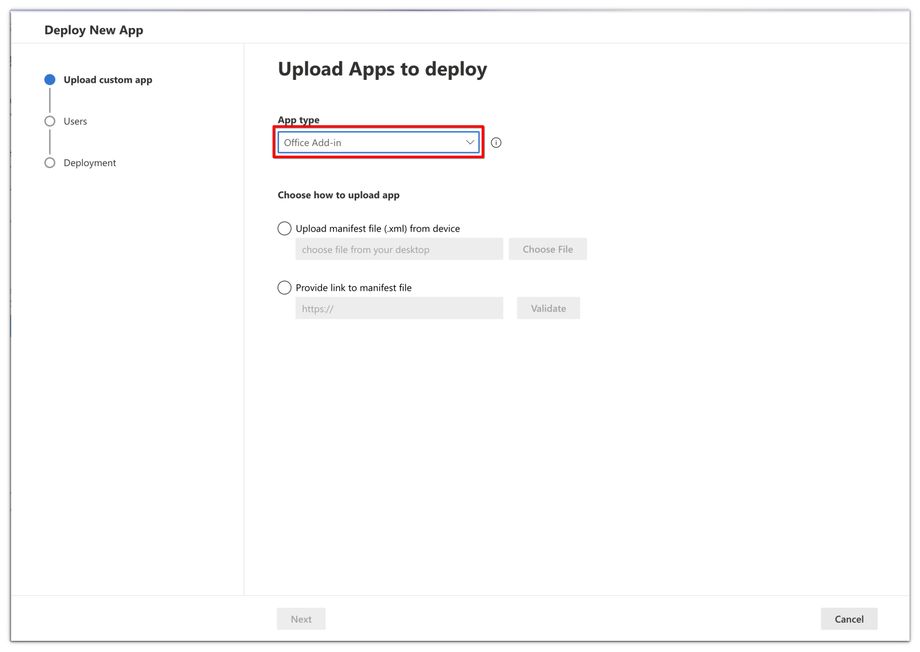
4. Select the app type from the pop-up dialog and choose "Office Add-in" as the app type.
5. Enter the manifest file URL: https://<yourdomain>/manifest.xml.
6. Click "Validate" and proceed to "Next" if validation is successful.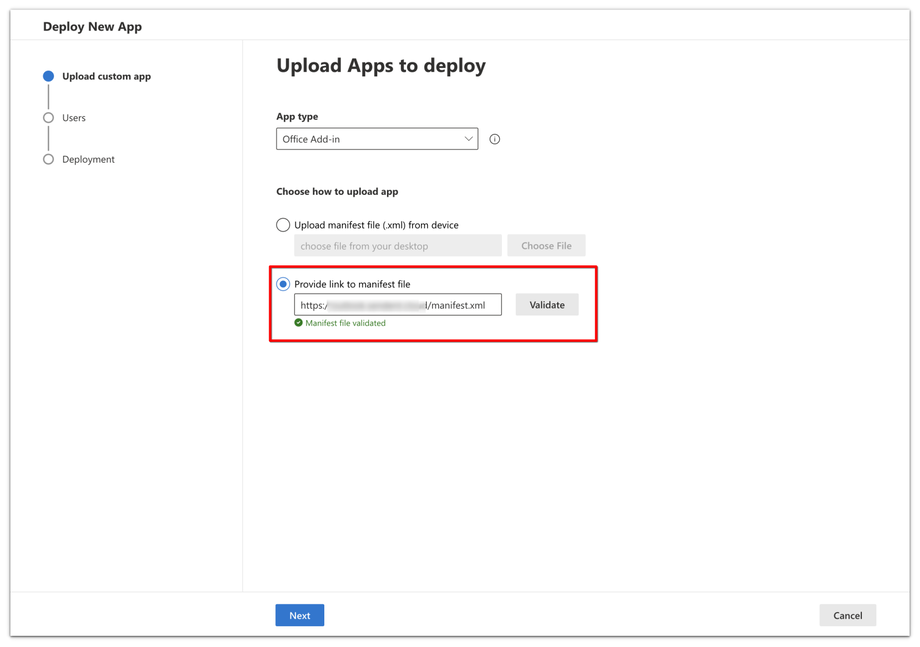
7. For Organization-Wide Distribution, select Entire organization.
8. Click "Next" to deploy the add-in to all users within the organization.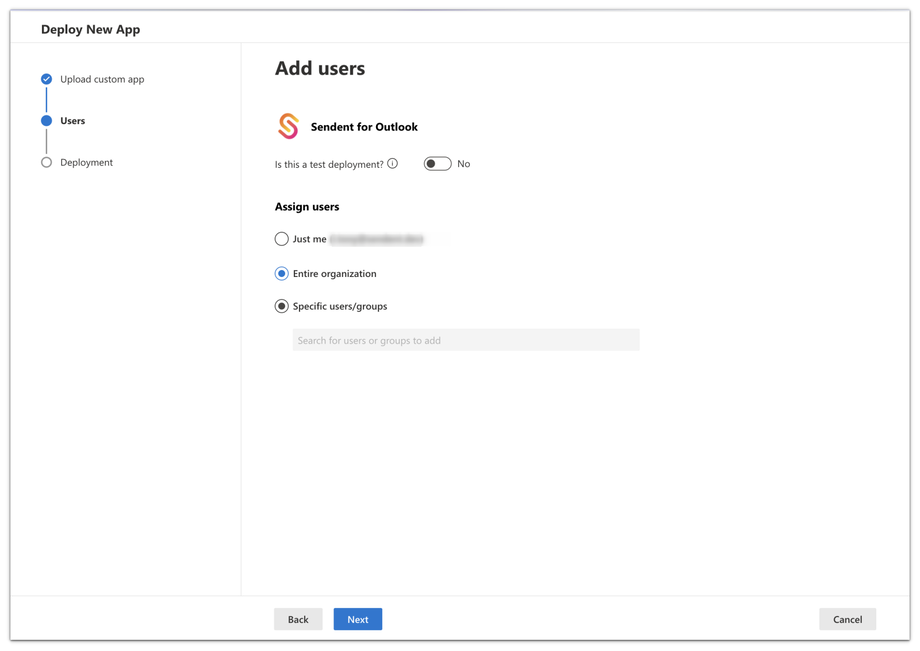
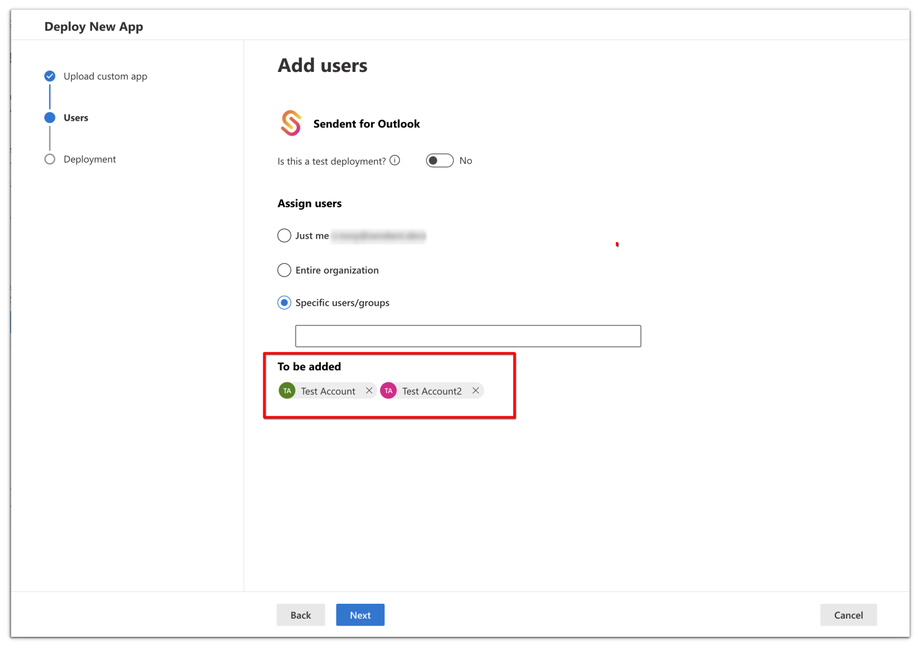
9. For Group Distribution, select Specific users/groups.
10. In the search box, enter the names of users or groups you wish to include.
Ensure the selected users or groups are accurate to avoid unintended access or lack of access to the add-in. You can edit users later after the add-in is installed.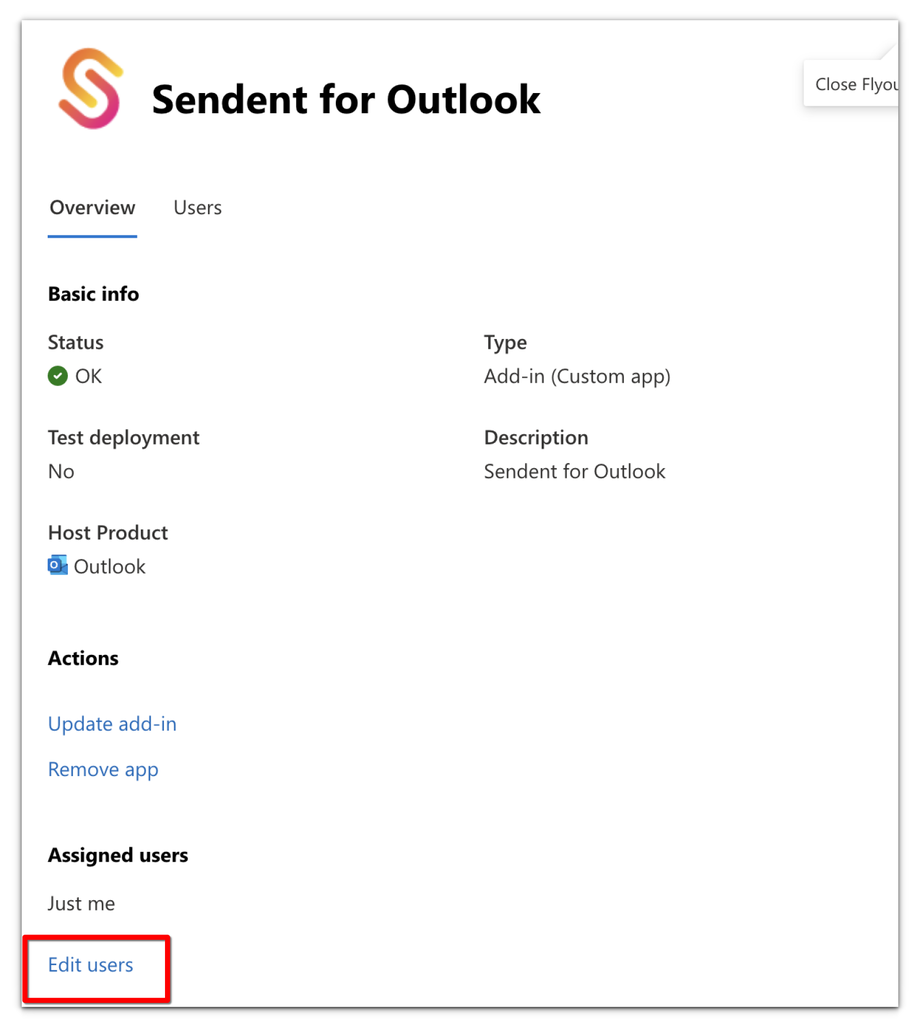
11. Click "Next" after selecting the right option.
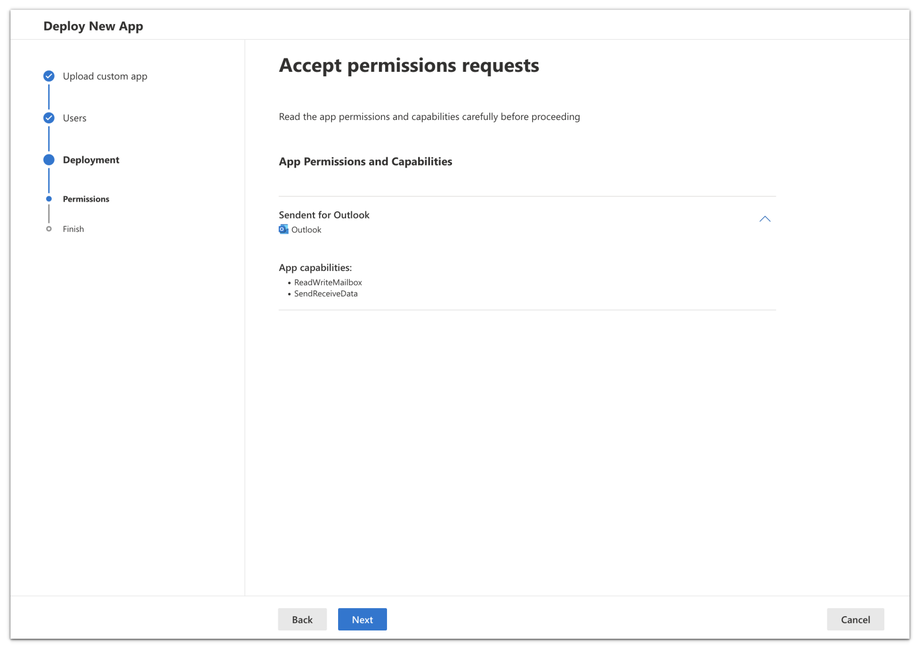
12. Review the app permissions and capabilities required by the add-in. Click "Next" to continue.
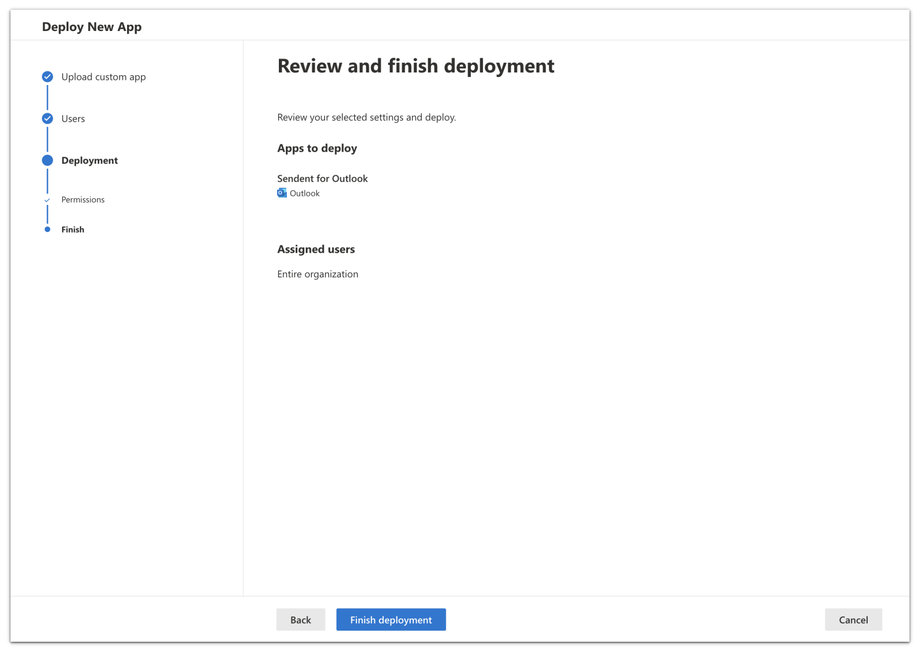
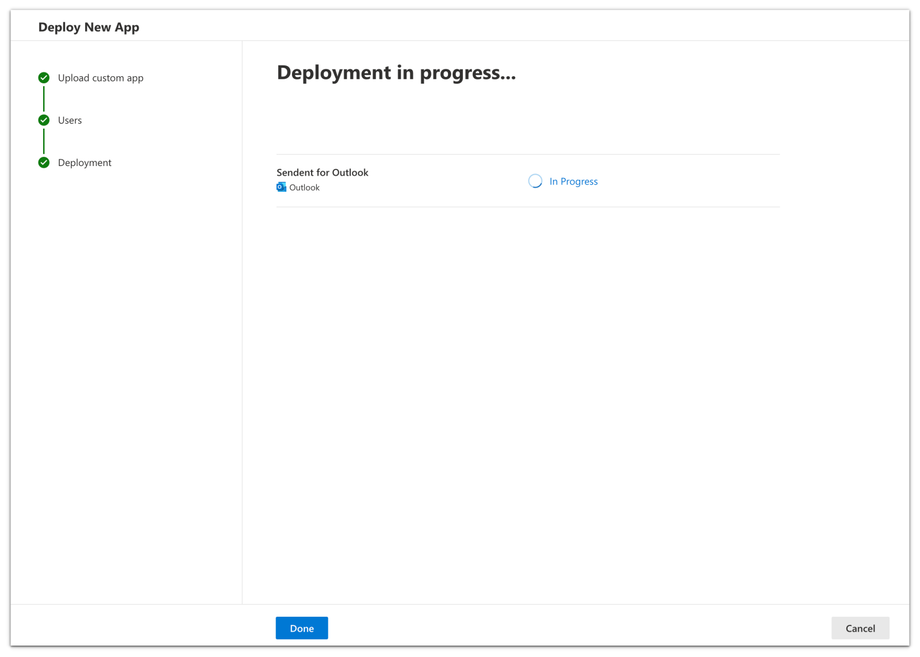
13. Verify the add-in details and the targeted users/groups if you selected this option. Click "Finish deployment" to initiate the process.
- Deployment Timeline: Allow up to an hour for the deployment to complete.
- Restart Outlook: You may need to restart Outlook to ensure the add-in's visibility.


