How to Install Sendent for MS Teams at Organization Level
Please note that actions performed on your Teams dashboard will be reflected across all Teams apps in the entire Organization regardless of the platform or operating system.
1. Go to Microsoft Teams Admin Center and log in with your credentials.
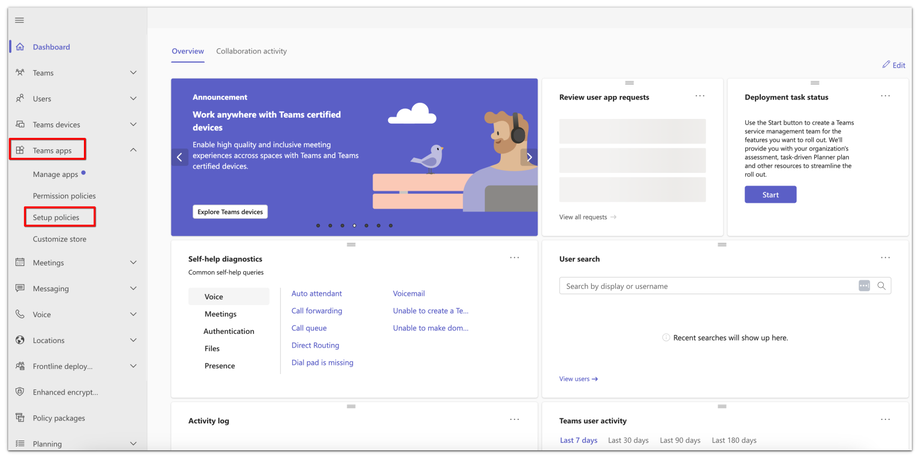
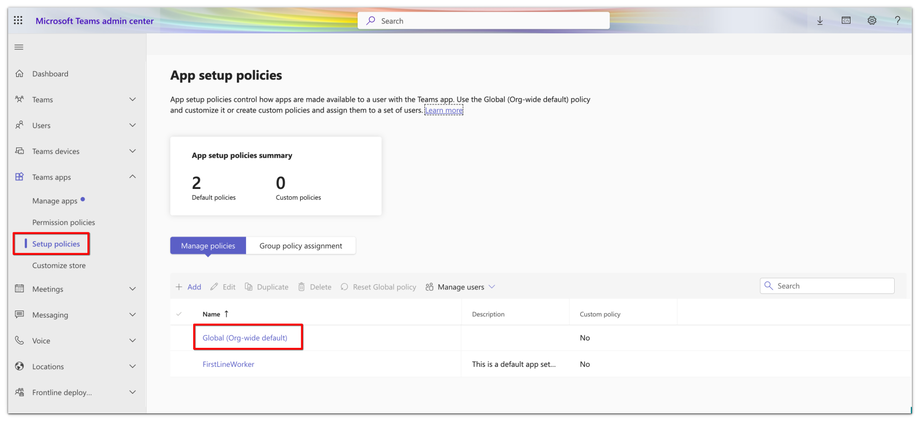
2. From the sidebar menu, click the Teams apps menu.
3. Click on the ‘Setup Policies’ option from the dropdown.
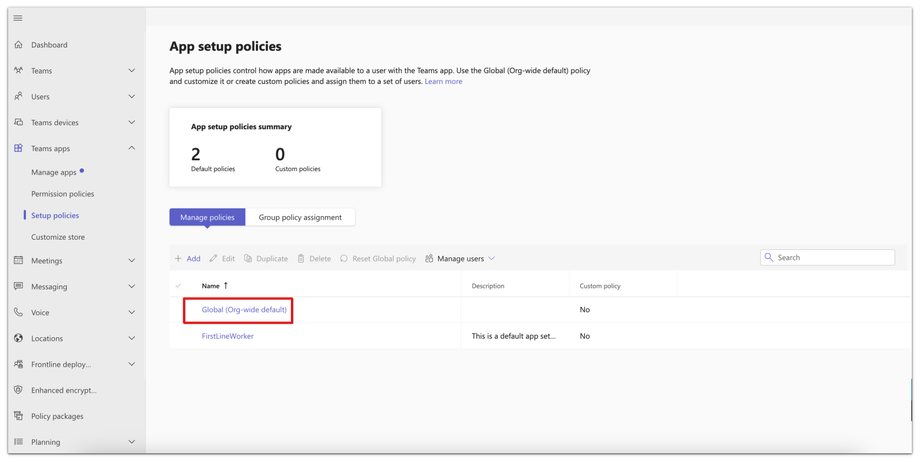
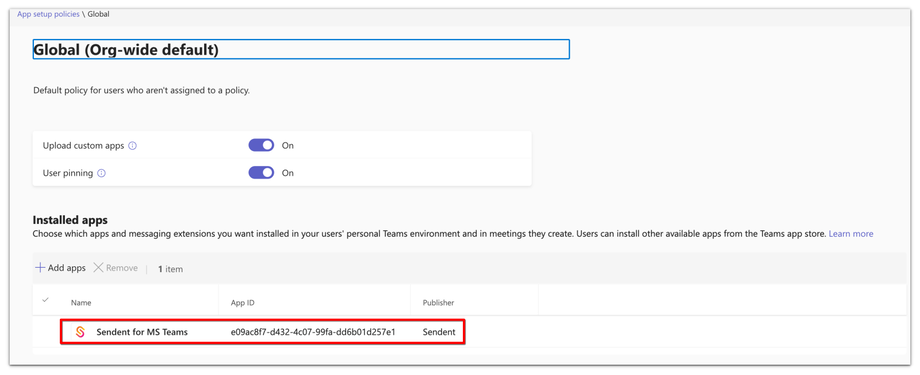
On the Setup Policies page, you can control how apps are made available to a user with the Teams app. You can customize the Global (Organization-Wide default) policy or create custom policies and assign them to a set of users.
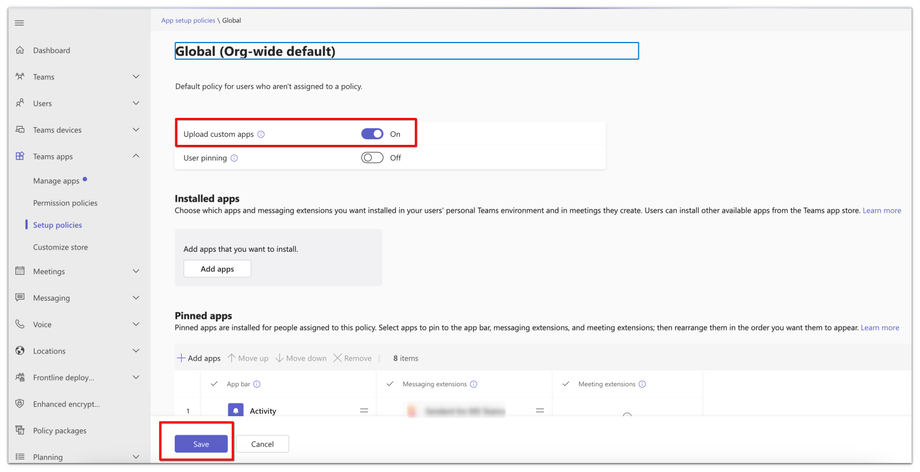
4. Click on Global (Org-wide default).
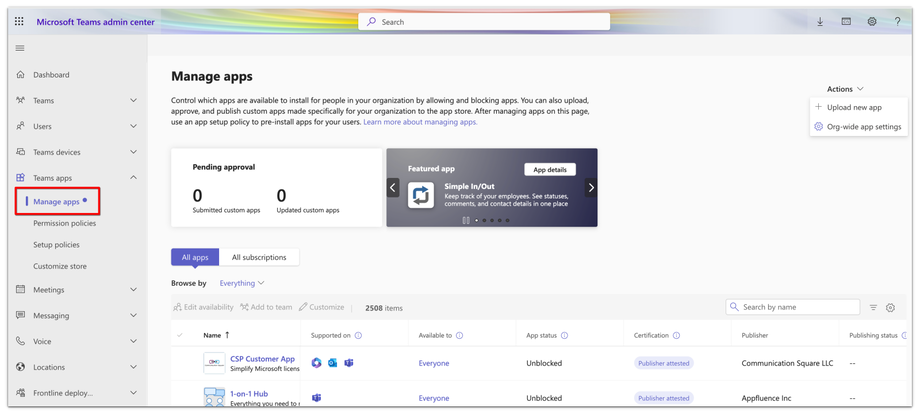
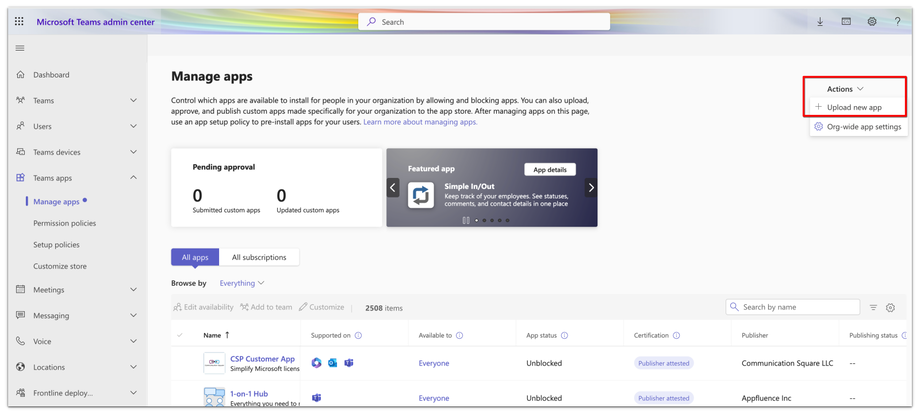
7. From the left-hand panel, under the ‘Teams apps’ section, click the ‘Manage apps’ option.
8. On the manage apps section, click the Actions button and click the Upload new app option.
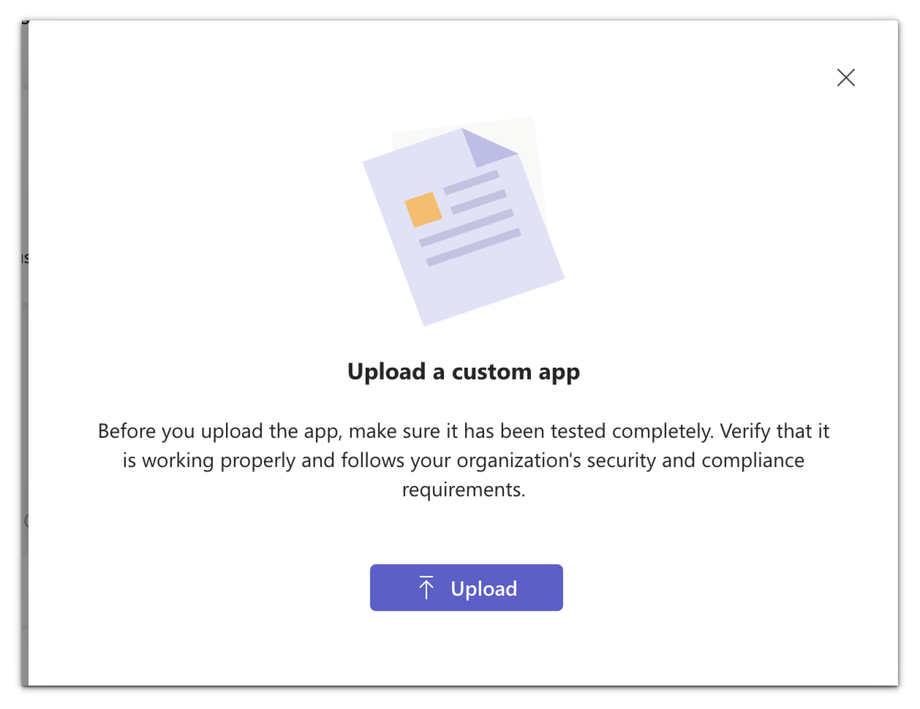
9. Click the Upload button.
10. Upload the ZIP file containing the three modified files: both icons and the updated manifest.json file. Refer to this guide on how you can download the Zip file and modify your manifest.json file.
11. Once the Sendent Teams App is uploaded, click on ‘Setup Policies’ from the sidebar menu and click on ‘Global (Org-wide default)’.
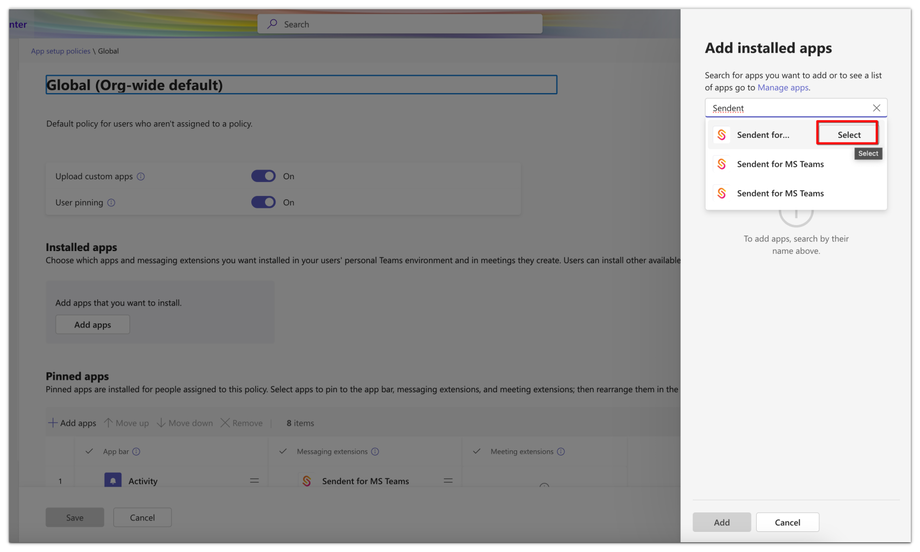
12. Click the Add Apps button.
13. From the pop-up window, search for the Sendent app and click the select button.
14. Click the Add button at the bottom.
15. Your Sendent for Teams app is now installed
Once installed, users can add the Sendent App to their Teams as described in this guide.


