How to Install Sendent for MS Teams at Individual Level
As a user, you can only add Sendent if your administrator has installed it through the admin dashboard. If you are an Admin please refer to this guide for details on how to install Sendent for Teams.
1. Open Microsoft Teams on your device and log in with your credentials.
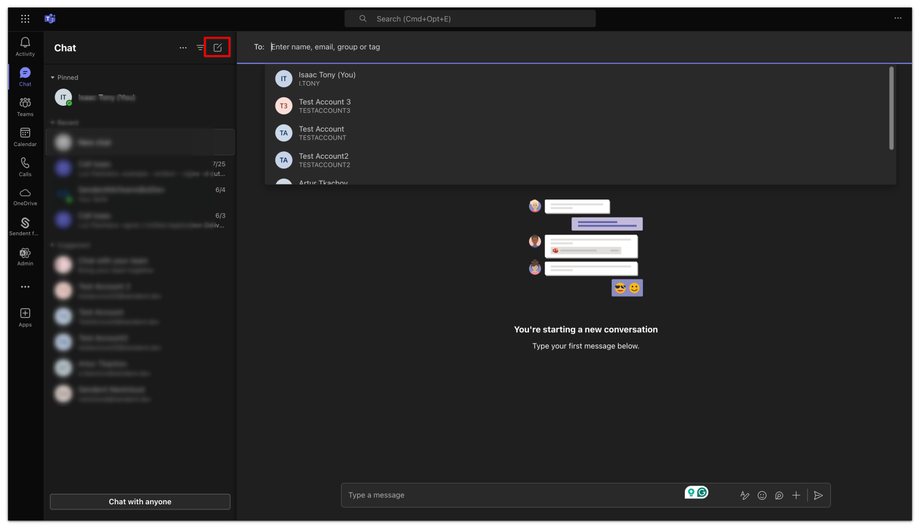
2. Navigate to an existing conversation or start a new one where you want to use Sendent.
3. You can start a new conversation by clicking the new chat button.
4. Click on the 'Add Apps' button icon in the toolbar, then search for ‘Sendent’. Click on ‘Sendent Teams’.
5. Click the Add button.
6. When you first add Sendent, you will be prompted to log in. Enter your Nextcloud server URL and click ‘Sign in.’
7. The Sendent icon should now be visible on the toolbar.
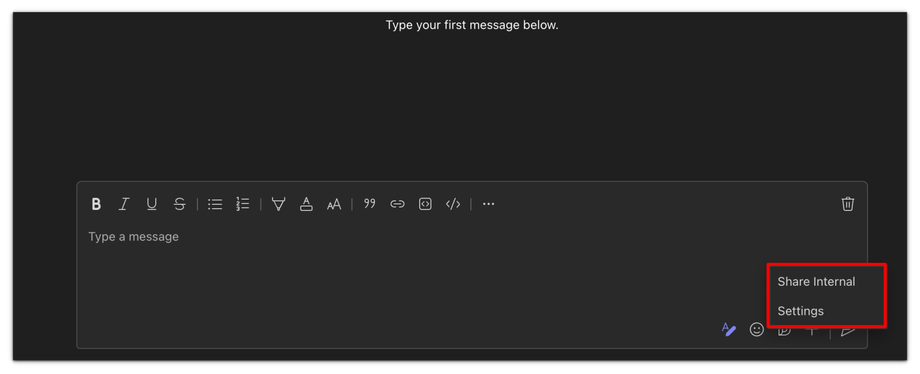
8. Once installed, you can find Sendent in the bottom bar or by clicking on the ‘…’ icon. Clicking on the Sendent icon will present you with three options:
Share Internal: This is for sharing files with internal users who have directory permissions.
General Settings: Access and modify general settings for the Sendent application.


