(Awaiting Approval) Configuring Microsoft 365 (Graph API)
This guide explains how to configure authentication for the Nextcloud Exchange Connector using the Microsoft Graph API.
Note:
Microsoft is ending support for Exchange Web Services (EWS) in October 2026. To ensure uninterrupted synchronization, Microsoft 365 (Cloud) environments must migrate to the Graph API using modern OAuth 2.0 app-only authentication via Microsoft Entra ID.
Pre-requirements
Before you begin the app registration process, ensure you have the following:
Administrative Access: You must have Global Administrator privileges in your Microsoft Entra ID tenant to grant organizational consent for the required API permissions.
Active Microsoft 365 Tenant: An active Microsoft 365 subscription.
Step 1. Register the Application in Microsoft Entra
Why this is needed: Registering the application generates a unique Application (client) ID and Directory (tenant) ID. These identifiers act as the routing credentials for your connector to securely communicate with the Microsoft 365 cloud.
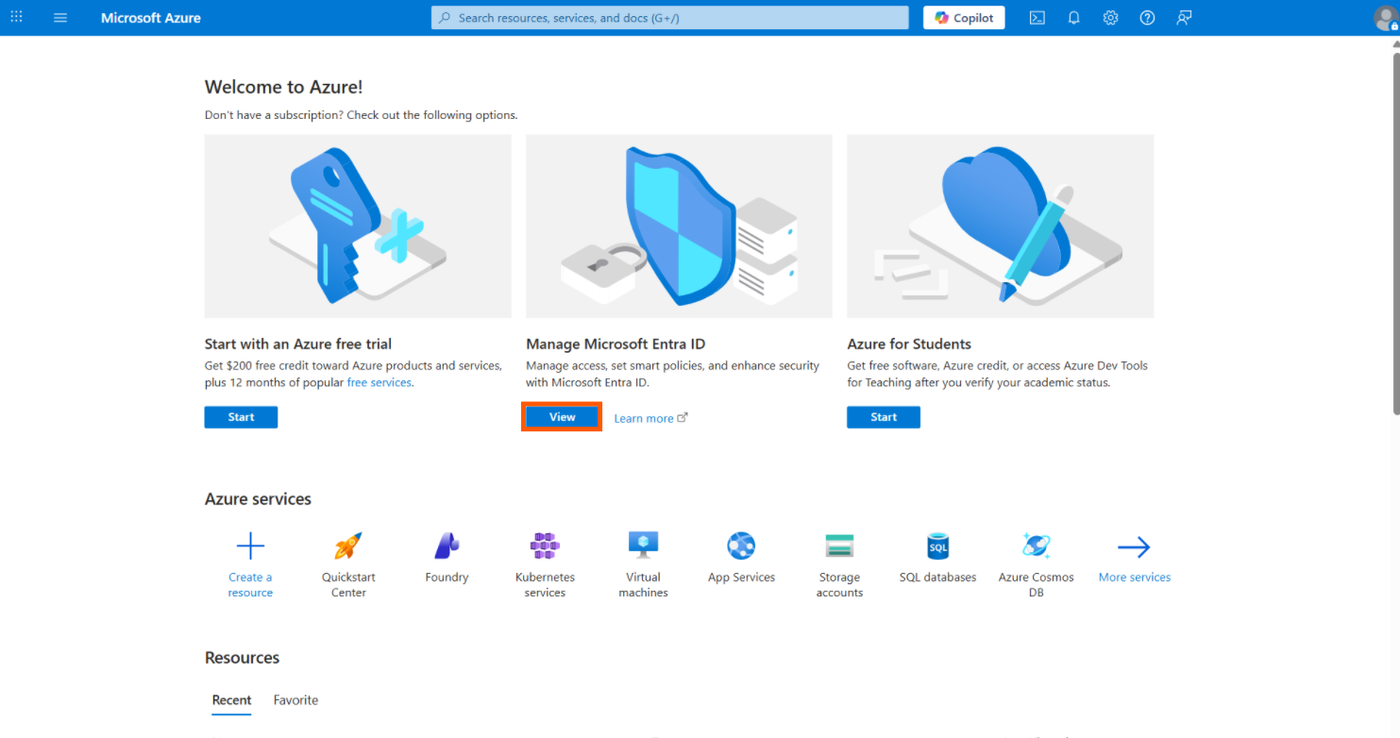
Open a browser and log in to the Microsoft Azure Portal.
Navigate to Microsoft Entra ID.
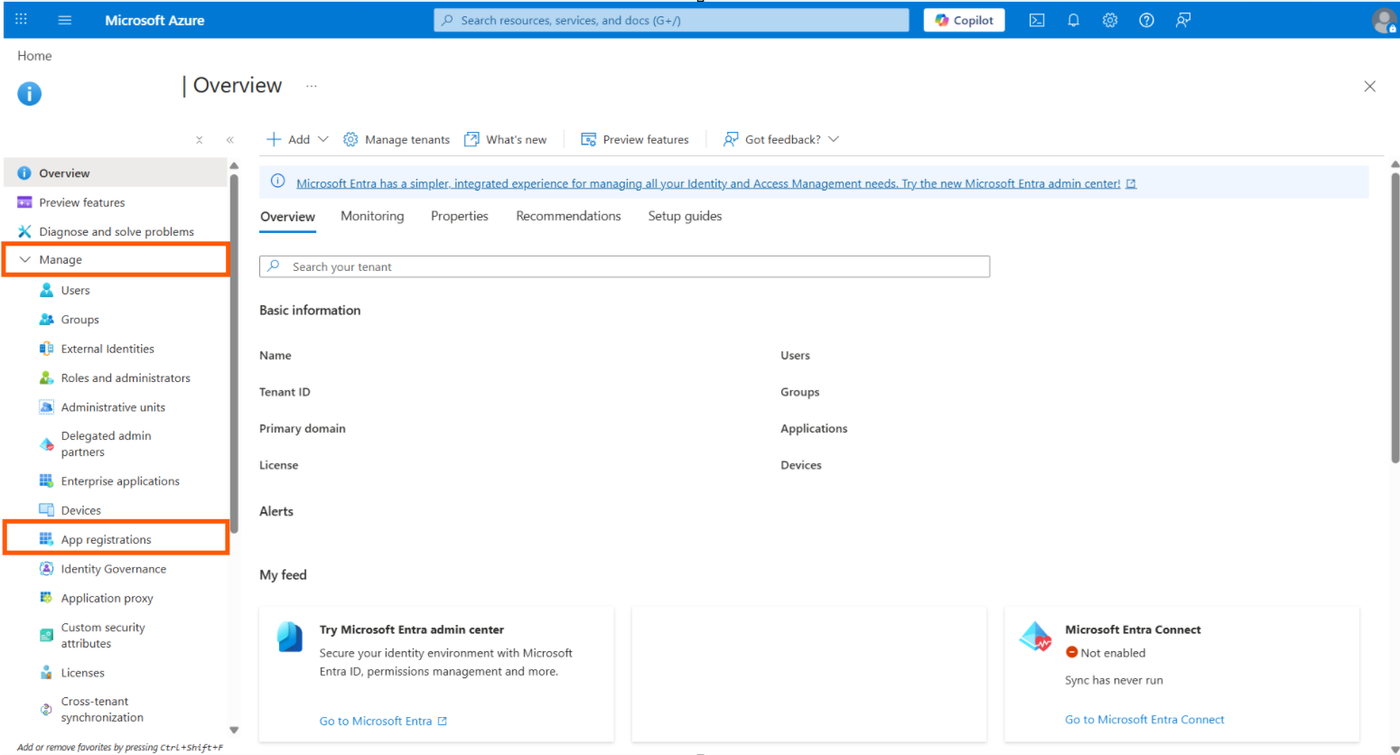
Navigate to App registrations (located in the left sidebar under Manage).
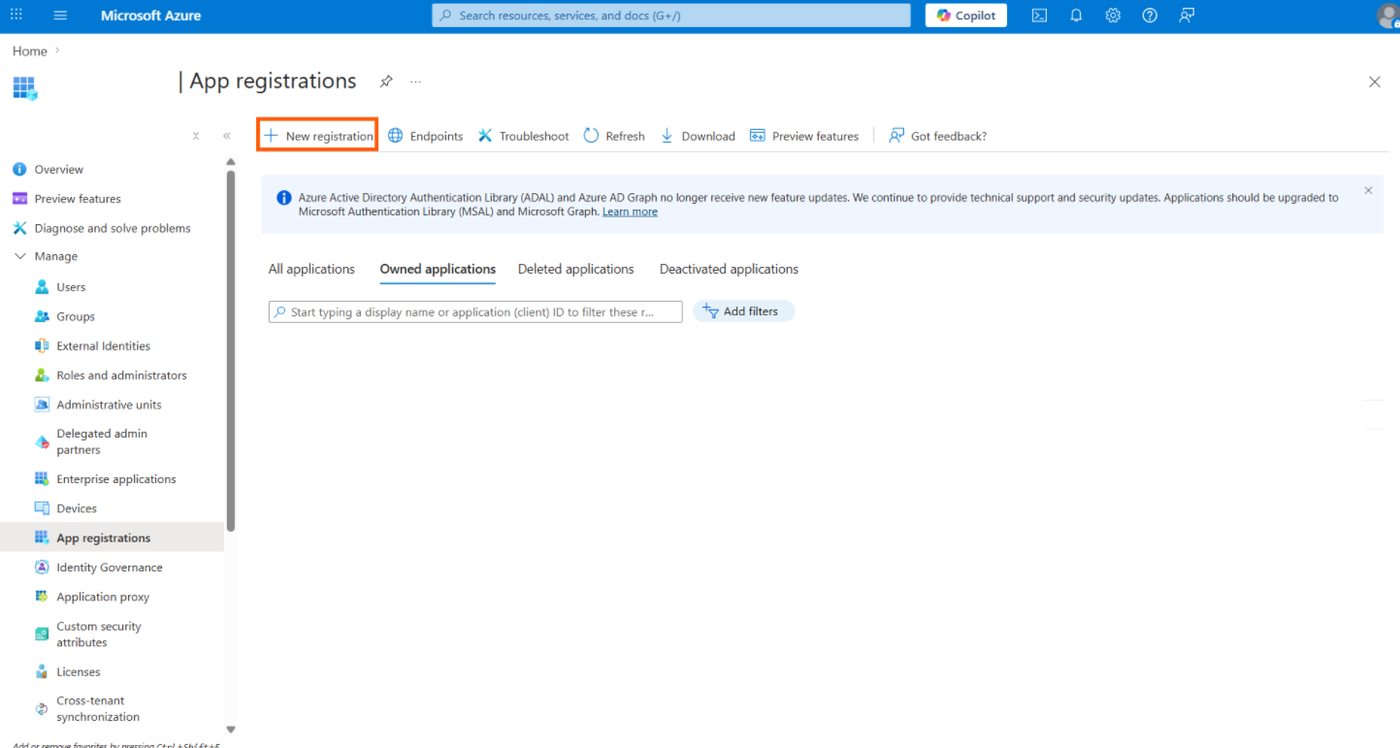
Click New registration at the top of the page.
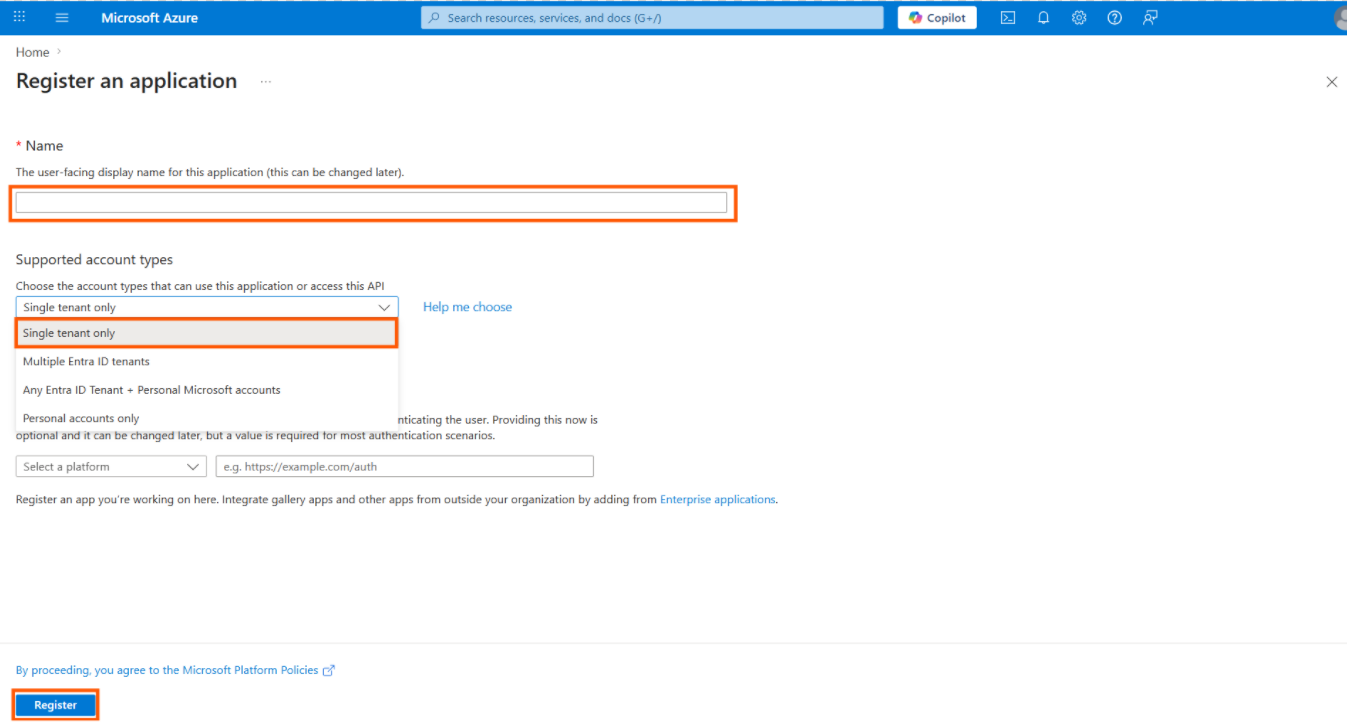
Fill out the registration form with the following parameters:
Name: Enter a friendly name (e.g.,
Sendent Sync Service - Graph API).Supported account types: Select Accounts in this organizational directory only (Single tenant).
Redirect URI: Leave this field empty.
Click Register.
Once the app is created, you will be redirected to the Overview page. Copy and save the following identifiers; you will need them later:
Application (client) ID(This will be your AppId)Directory (tenant) ID(This will be your TenantId)
Pro Tip: EWS to Graph API Migration
If you are migrating an existing setup from EWS to Graph API, your TenantId will remain exactly the same, as both applications reside in the same organizational tenant. You will only need to update your configuration with the new AppId and ClientSecret generated during this process.
Step 2. Configure Permissions for App-only Access
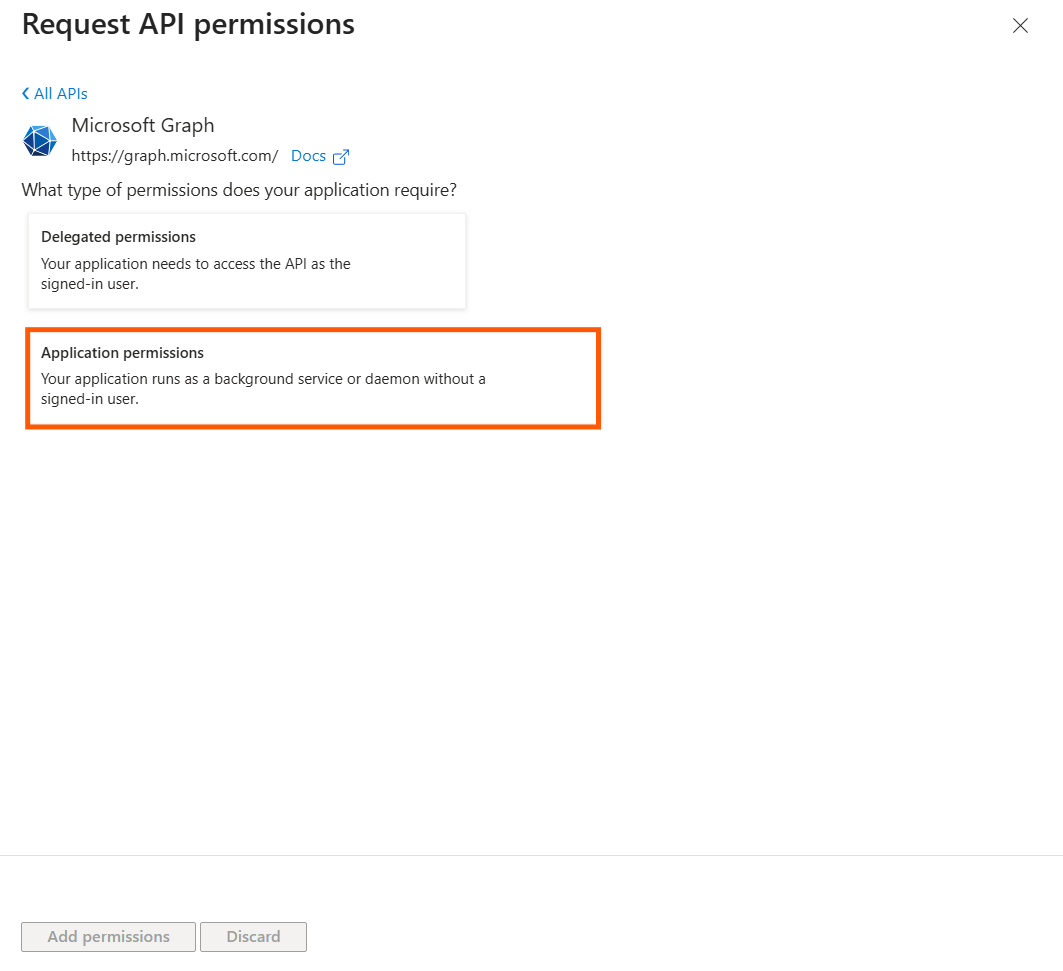
Why this is needed: The connector operates as a background daemon without a signed-in user present. It requires "Application permissions" to interact with the Graph API and sync calendars and contacts across the organization.
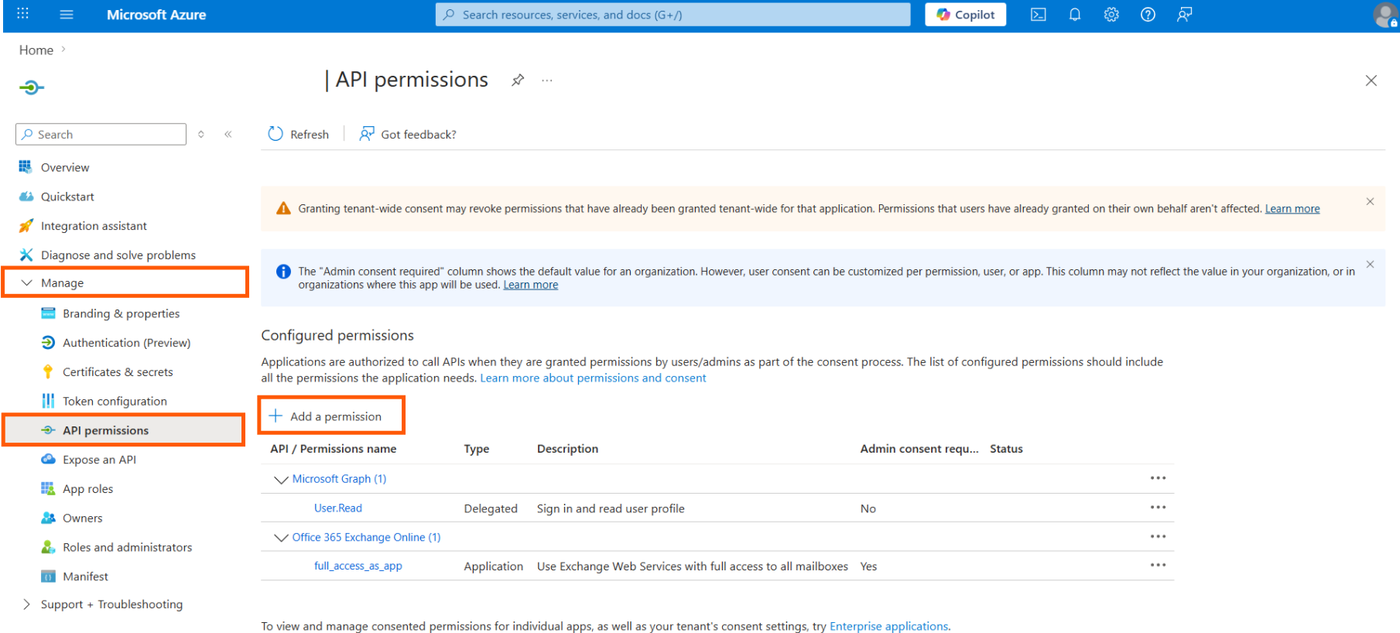
In your app registration menu, navigate to Manage > API permissions.
Click Add a permission.
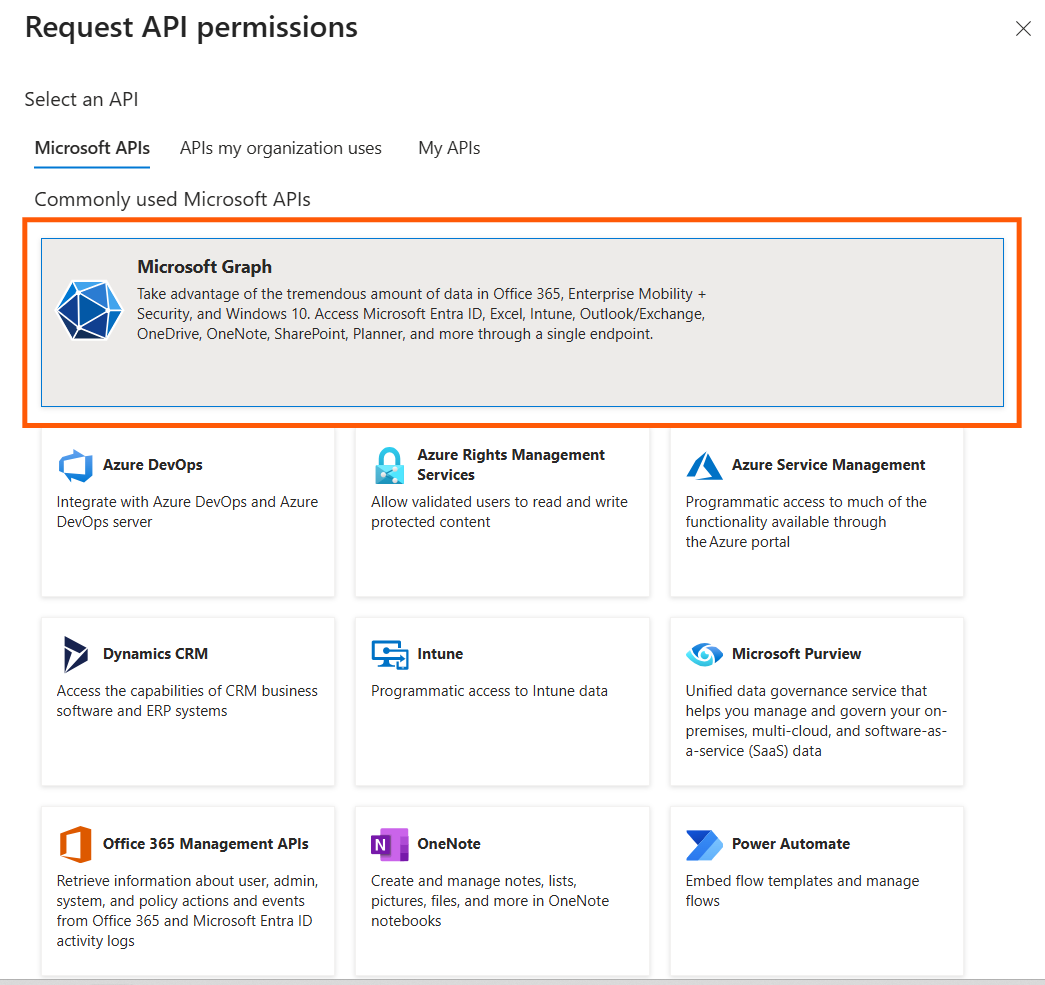
Select Microsoft Graph.
Select Application permissions.
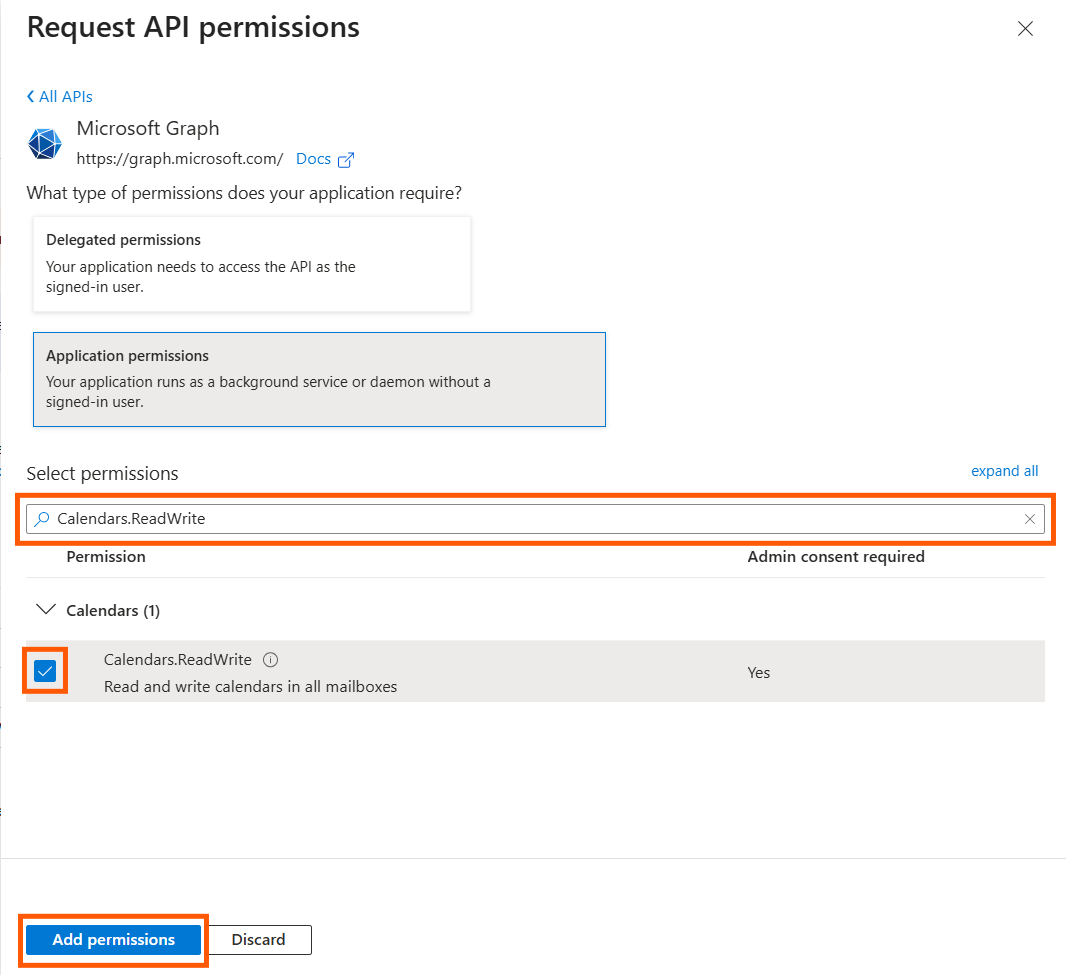
Search for and check the following permissions:
Calendars.ReadWriteContacts.ReadWriteUser.Read.All
Click Add permissions.
Warning: Grant Admin Consent
Adding the permissions is not enough. A tenant administrator must click the Grant admin consent for [Your Organization] button on the API permissions page. If this step is skipped, the permissions will remain inactive, and Graph API will deny all synchronization requests.
Step 3. Create a Client Secret
Why this is needed: The Client Secret acts as the password for your newly registered application, proving its identity to Microsoft Entra ID when requesting an access token.
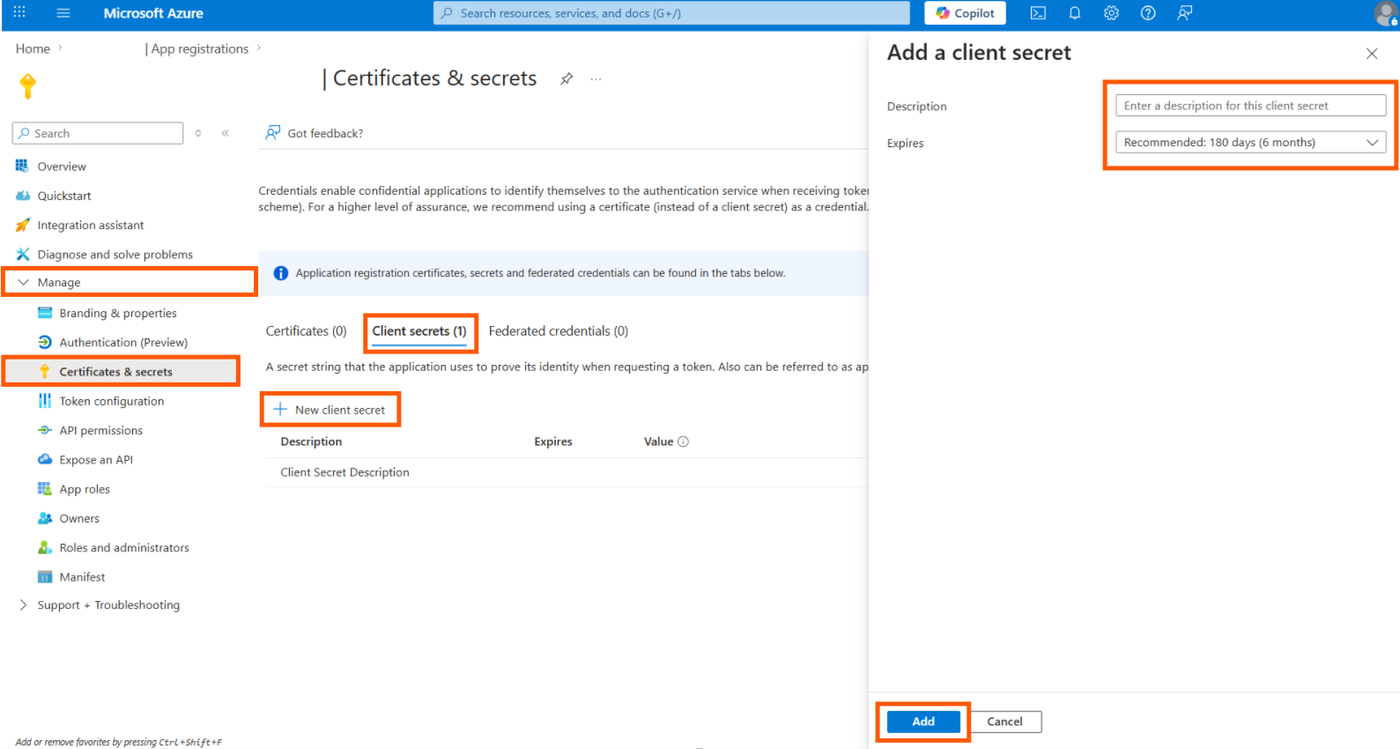
Navigate to Manage > Certificates & secrets.
Under the Client secrets tab, click New client secret.
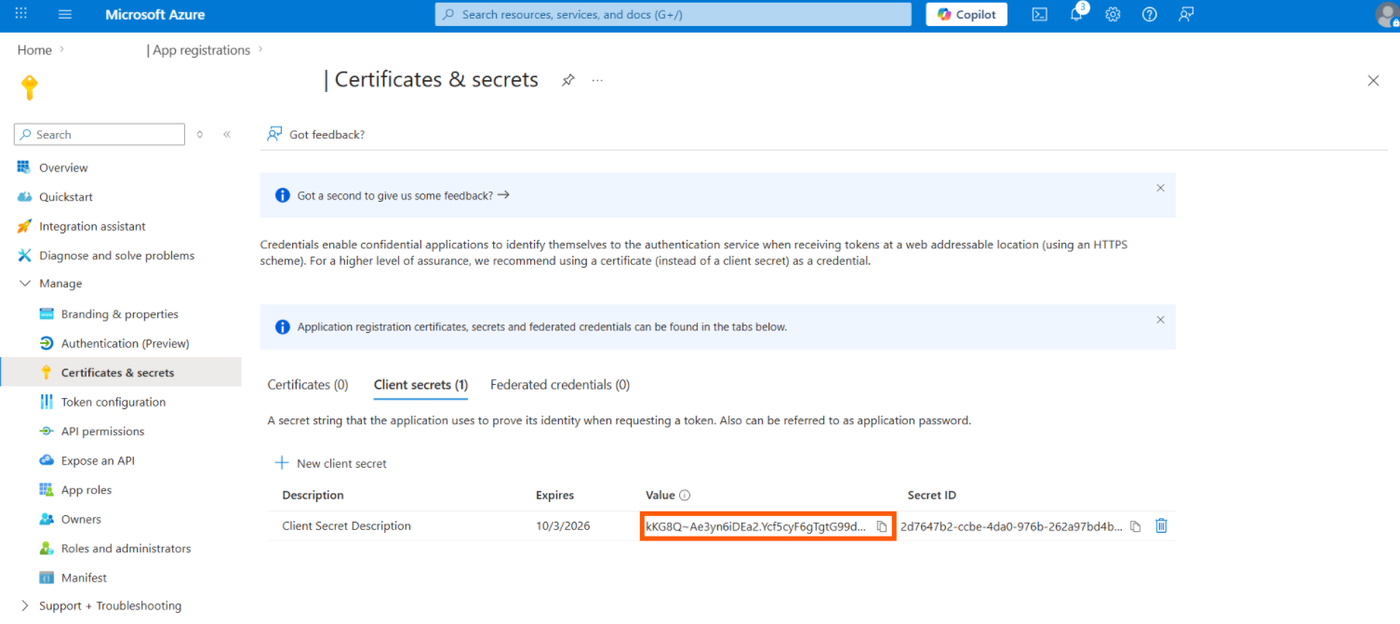
Add a description and choose an expiration period, then click Add.
Immediately copy the
Valueof the client secret. You will not be able to view it again once you leave the page.
Pro Tip: Managing Scalability and Throttling
If your application experiences 429 (Too Many Requests) or throttling errors during heavy synchronization operations, it means the processing limits have been reached. To resolve this, you should either reduce the number of threads allocated per admin account or increase the total number of application instances.
Step 4. Save Credentials for Installation
You have successfully generated the required Graph API access keys. Keep these values secure to build your configuration files.