How to Use Guest Accounts to Share Files
The Guest Accounts feature allows users to connect shared files with recipients through dedicated guest accounts, which can even be created automatically. This ensures that frequent recipients always have easy, centralized access to all shared files. By creating guest accounts based on the recipient's email, the feature streamlines file sharing and management, enhancing convenience and security.
Once a share is created, the guest user receives an email notification with a link to set their password. Guest users can only access files shared with them and cannot create any files outside of these shares.
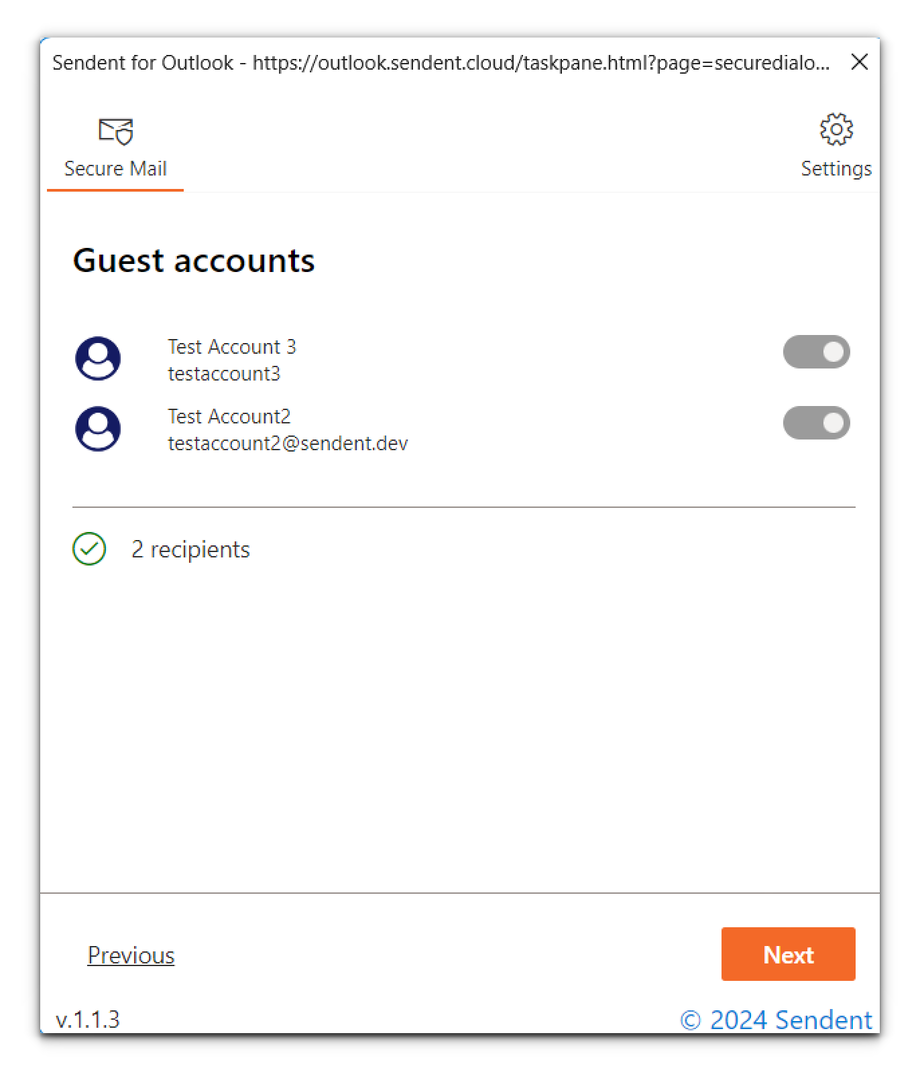
When the guest feature is enabled, a window will appear when you click on “Share” in the Sendent window. You can select one or multiple email addresses. If you're an Admin, please refer to this guide on configuring the guest account settings.
1. Open your web browser and navigate to your Outlook account.
2. Click the New Email button to start composing your new email.
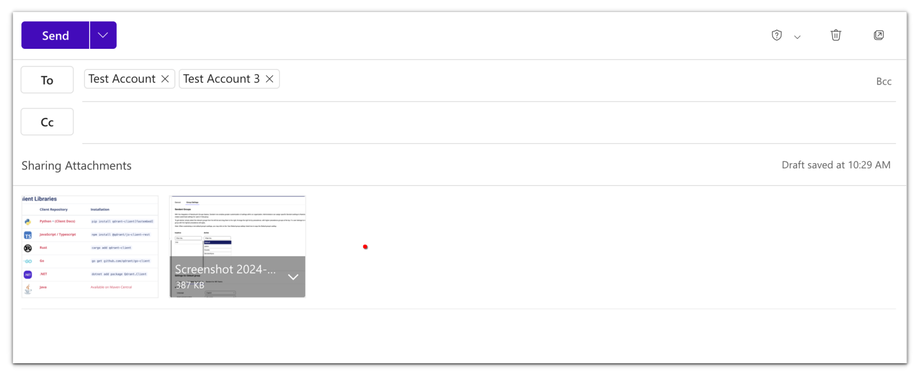
3. Enter the email recipient and select the attachments you want to send alongside the email.
4. Click the Send button to begin the process.
5. Set the password and expiration date.
6. If the guest account feature is enabled, you'll also have the option to choose the recipients. You can also click the Edit button to edit the recipients. 
If a Guest account doesn’t exist yet, this will automatically be generated once you click save.
7. If an email address is deselected, neither files will be shared, nor will there be a Guest account created for this email address.

