How to Remove OneDrive from Microsoft Teams
Reference article: https://learn.microsoft.com/en-us/microsoftteams/turn-off-teams-native-file-upload-policy
1. Login with your administrator Azure Account in Powershell
Using powershell, execute the following command: az login
More details can be found here: https://learn.microsoft.com/en-us/cli/azure/reference-index?view=azure-cli-latest#az-login
2. Turn-off for Entire Tenant
The following command will disable the OneDrive file-upload means
Set-CsTeamsFilesPolicy -Identity Global -NativeFileEntryPoints Disabled
3. Remove OneDrive button in Microsoft Teams
Now login as a administrator at https://admin.teams.microsoft.com/.
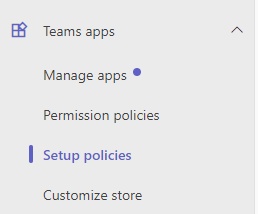
1. On the left side in the menu bar, navigate to 'Teams Apps' > 'Setup Policies'.
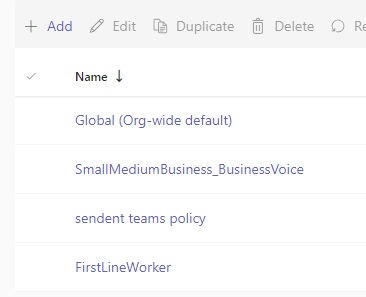
2. In the following list of policies select 'Global (Org-wide default)'.
Overview Policies
3. From there, under pinned apps, select 'OneDrive' (1) and click Remove (2).
Remove OneDrive
4. Now Click 'Save' in order to Save the policy.
Undo the disabling of OneDrive
With the following powershell command you can undo the file upload policy (OneDrive will be enabled again).
Remove-CsTeamsFilesPolicy -Identity Global
Then as an administrator, login into your Microsoft Teams admin center.
Teams Apps > Setup Policies > Global (Org-wide default).
And click 'add apps' and search for the OneDrive. Make sure to Save the policy.
Add apps


