How to Use Sendent Group Settings
With the integration of Nextcloud's Groups feature, Sendent allows for enhanced customization of settings within an organization. Administrators can assign specific Sendent settings to Nextcloud groups, enabling tailored configurations for users within those groups.
For example, Group settings can be used to ensure that different departments, such as accounting and IT, have system preferences tailored to their needs. This feature allows for more precise and effective management of group-specific settings, enhancing the overall efficiency of your organization.
To access the Sendent group settings:
1. Navigate to your Nextcloud settings and open the Theming app.
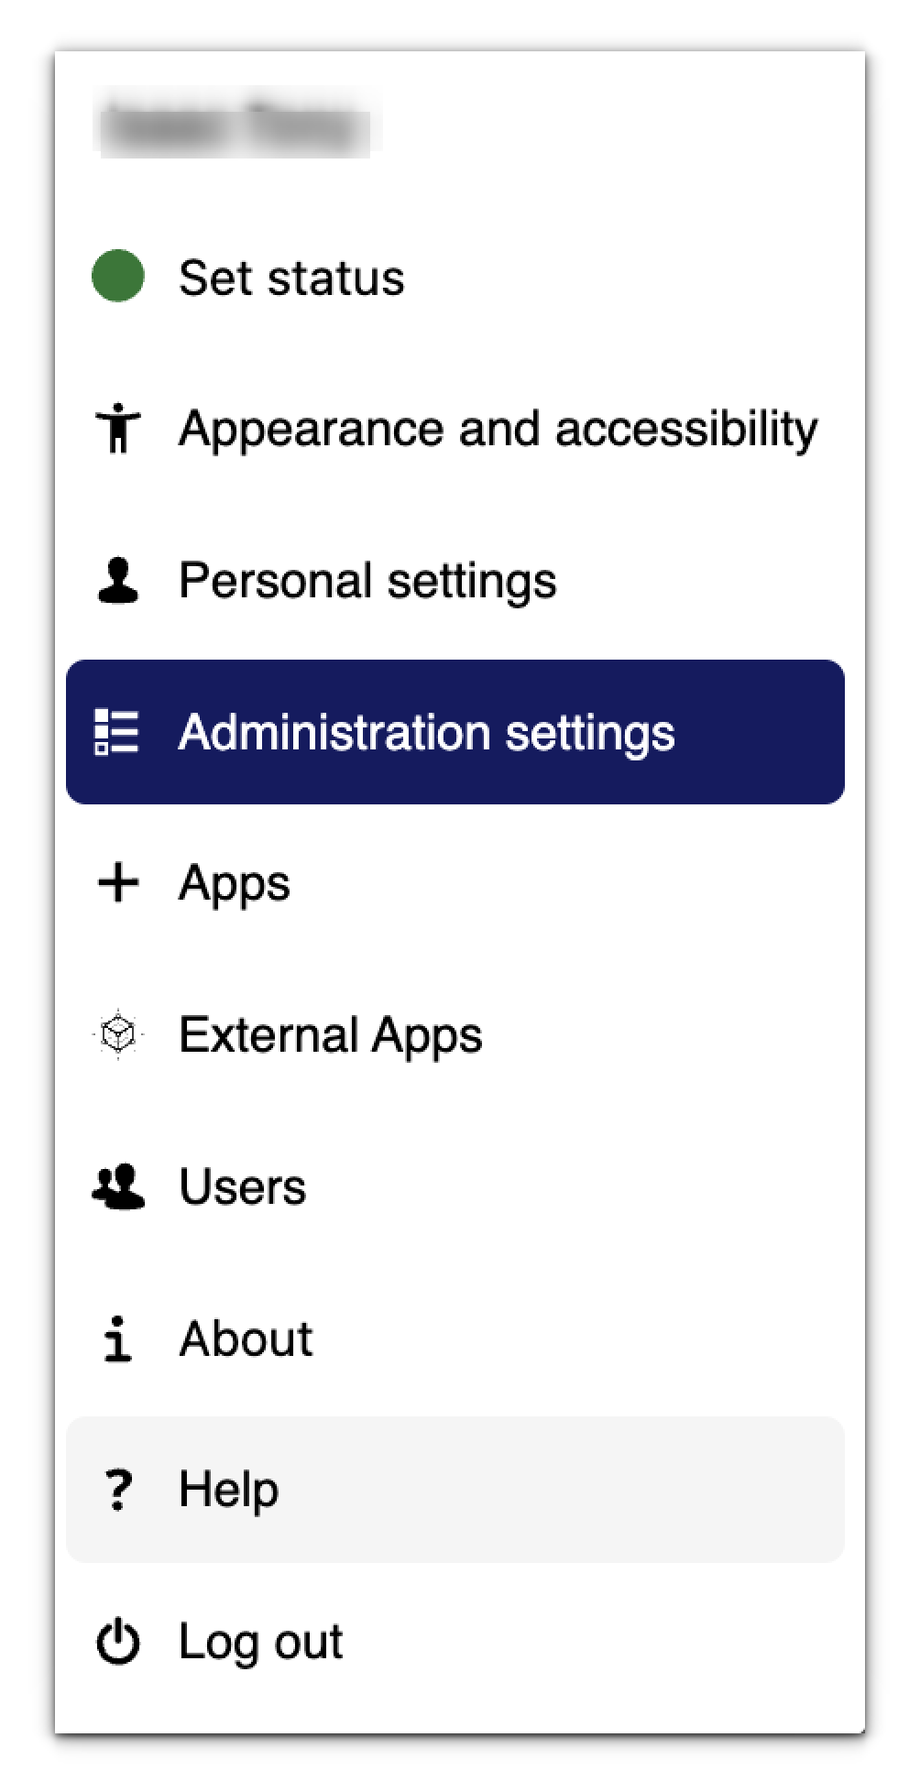
2. Click on your user avatar or name in the top right corner of the Nextcloud interface and then click on the "Administration Settings" option.
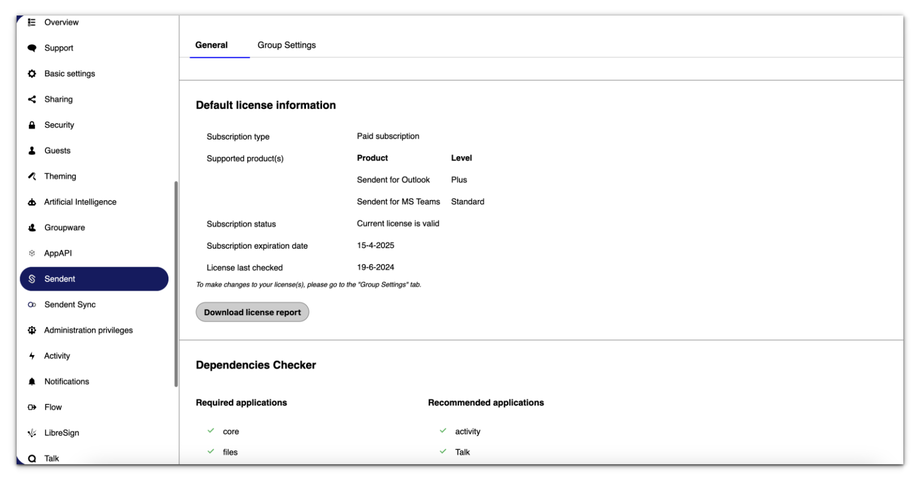
3. From the sidebar menu, click the "Sendent" option.
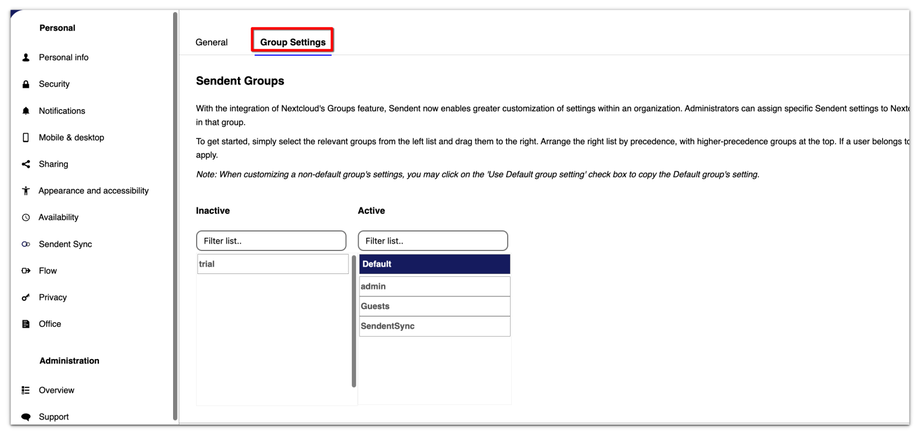
4. Switch to the group settings tab.
5. To begin, simply select the relevant groups from the left list and drag them to the right list. You can move groups between the active and inactive lists by dragging and dropping. This allows you to easily manage which groups are currently in use and which ones are not.
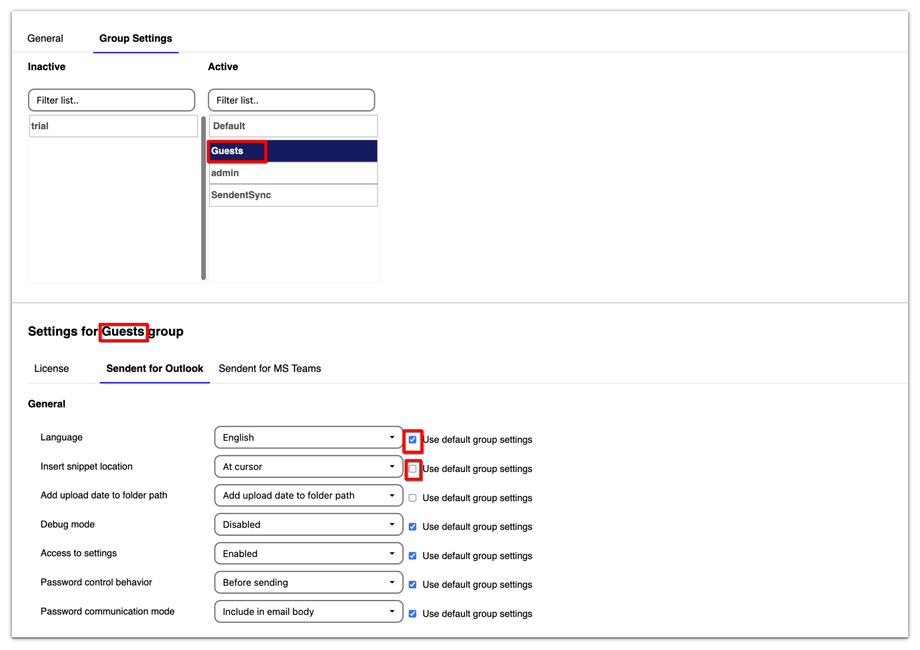
6. The 'default' group is always available and activated. When customizing a non-default group's settings, you can click on the 'Use Default group setting' checkbox to copy the Default group's settings. This provides a convenient starting point for further customization.
For instance, in the image below, the Guest group copies most settings from the Default group. 


