How to Configure your License Information on the Sendent Server App
First-Time Configuration.
1. Use an administrator account to log in to your Nextcloud instance.
2. Click on your profile icon and click on "Administration Settings".
3. Click the Sendent option from the sidebar menu.
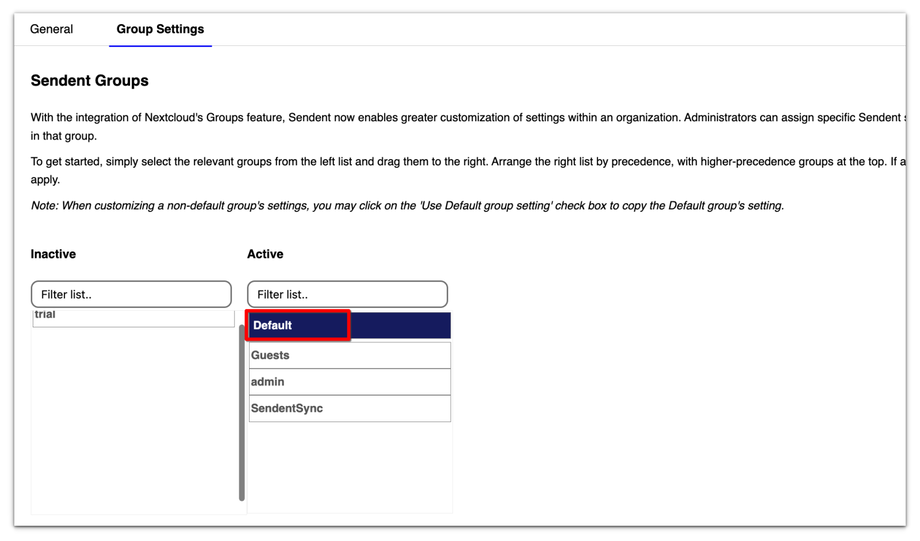
4. Click and switch to the Group Settings tab.
6. Enter the email address associated with your subscription for an email containing the license key.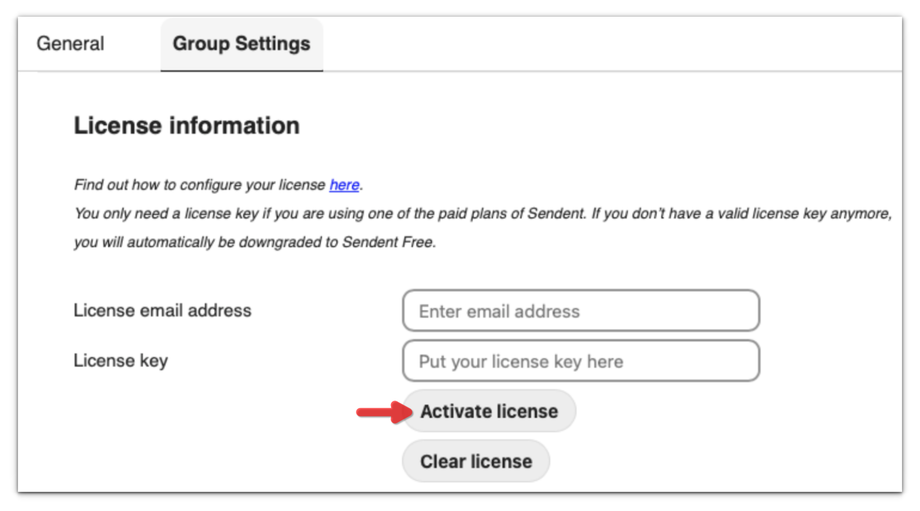
7. After a few moments, your license status and expiration date should be updated.
8. Once configured, you can apply this license to any other group by first selecting the name of the group from the list of active groups.
9. For example, you can select the Admin group.
10. Under-license information. Ensure the checkbox "Use Default group settings" is checked.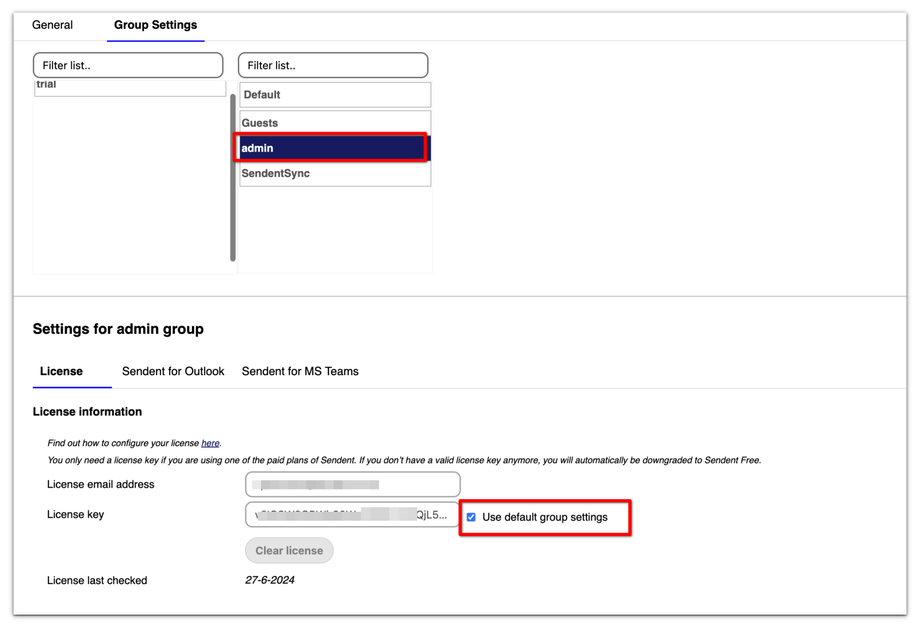
Applying a License to a Specific Group of Users
To do so, select the group from the list of active groups by clicking on it.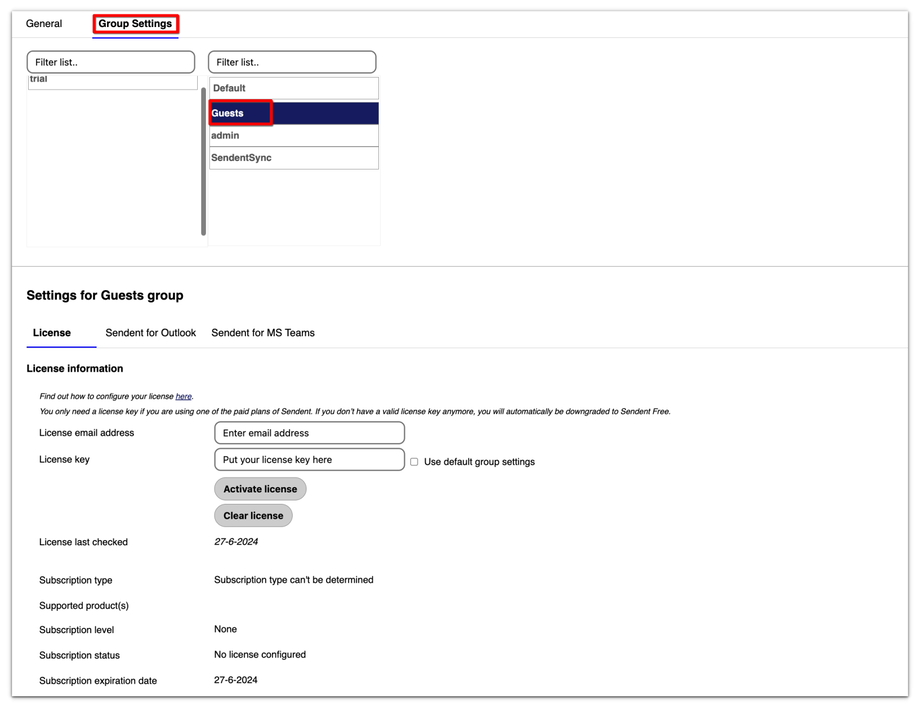
1. For instance, you can select a "Guests" group and enter your email address and the license key.
2. Ensure the checkbox "Use default group settings" is not checked. This ensures that this group does not copy the license details applied to the default group.
3. Click the activate license button to activate the license for the "Guests" group only.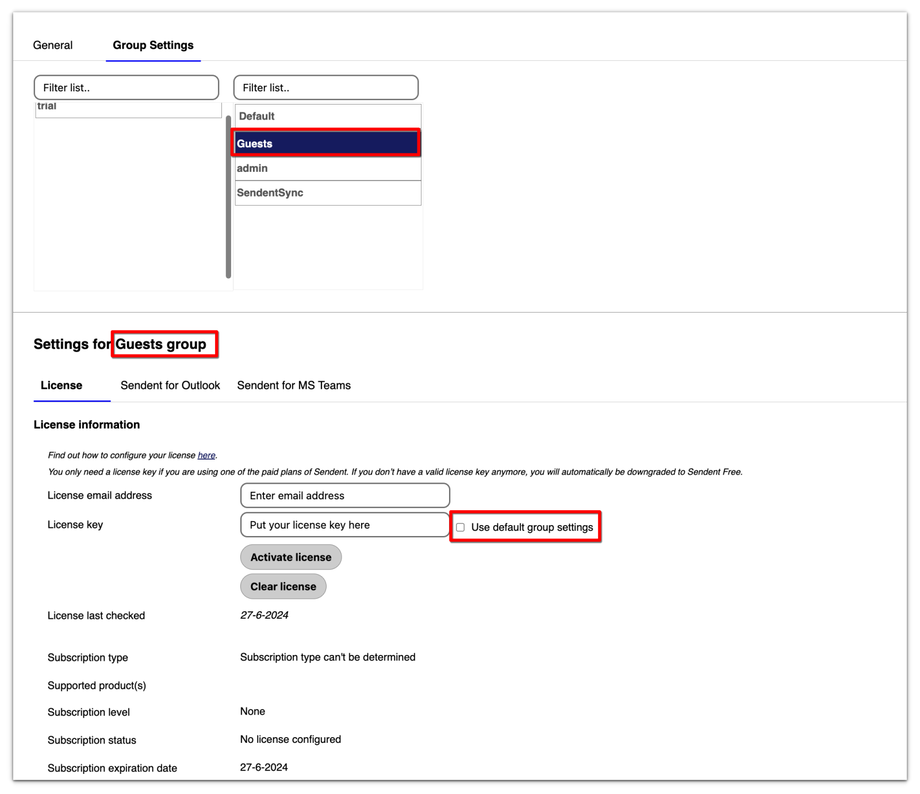
After a few moments, your license status and expiration date should be updated for this group.
Updating Your License Key
If your subscription is renewed or you switch to a different plan, a new license key will be generated. Follow these steps to update your license key:
1. Use an administrator account to log in to your Nextcloud instance.
2. Open the "Sendent" settings page and navigate to the "Group Settings" tab.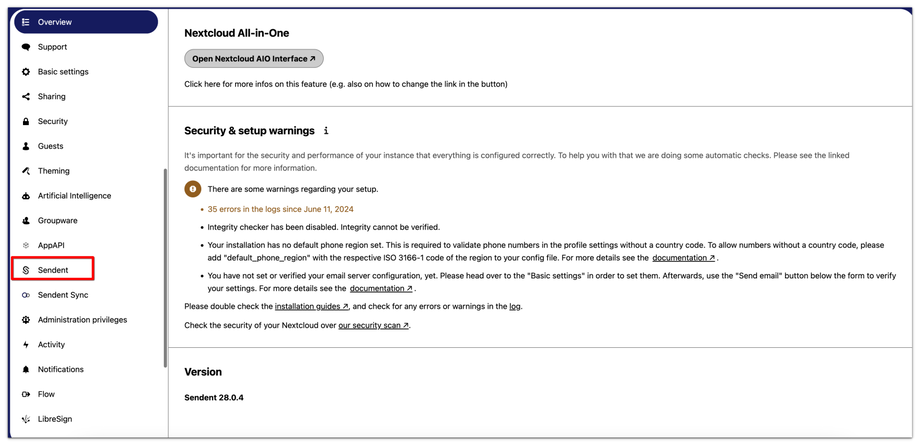
3. Scroll down to the "License Information" section.
4. Replace the old license key and, if necessary, the license email address with the new one provided via email.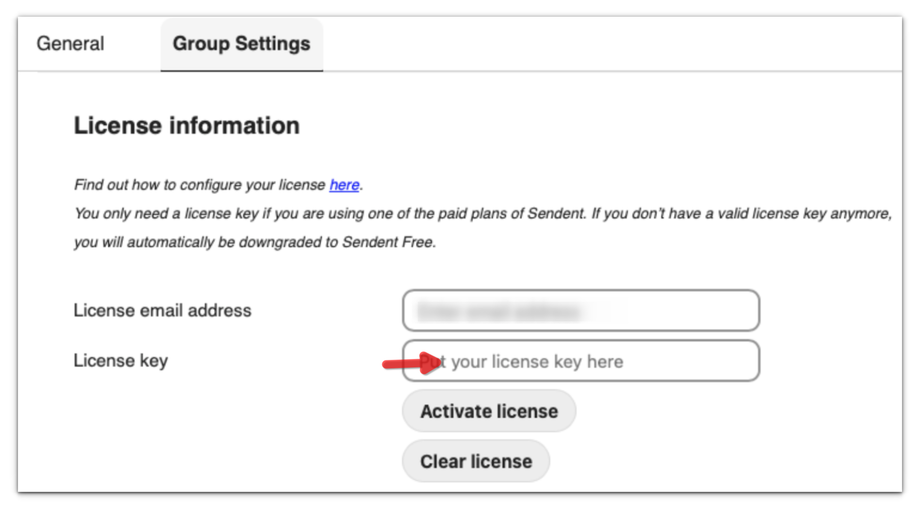
5. Click "Activate License" to complete the process.


