How to Configure Sharing Settings in Nextcloud
Nextcloud allows administrators to fine-tune the sharing behaviour to align with organizational policies and enhance security. This guide will walk you through the various sharing settings available in Nextcloud.
Nextcloud users can share files with groups, other users on the same server, and users on other Nextcloud servers and create public shares for non-Nextcloud users. As an administrator, you can control a number of user permissions related to file sharing.
Configuring Sharing Policies
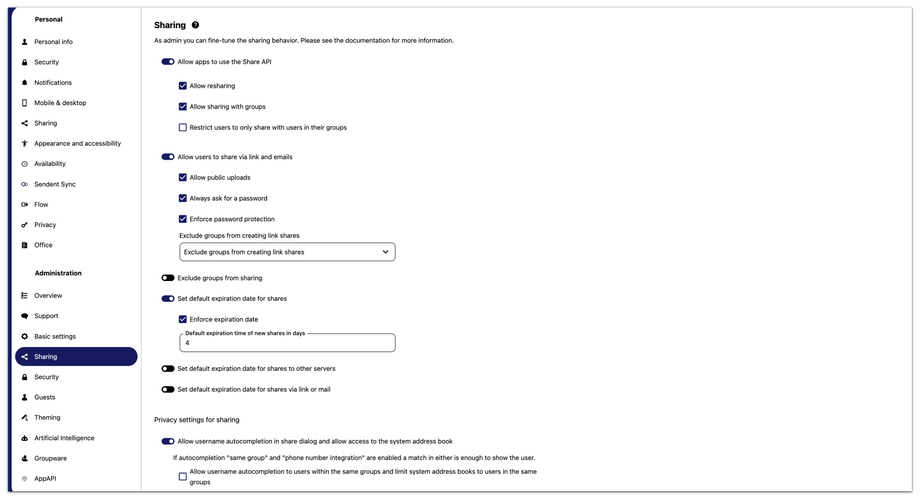
Access the sharing settings from the Administration settings page under the Sharing section by:
1. Click on your user avatar or name in the top right corner of the Nextcloud interface to open the user menu.
2. From the dropdown menu, select Administration settings.
3. From the sidebar menu, click the Sharing tab.
4. On this page, you can configure different settings that affect how users share files with other Nextcloud groups, other users on the same Nextcloud server, or other Nextcloud users on other Nextcloud servers.
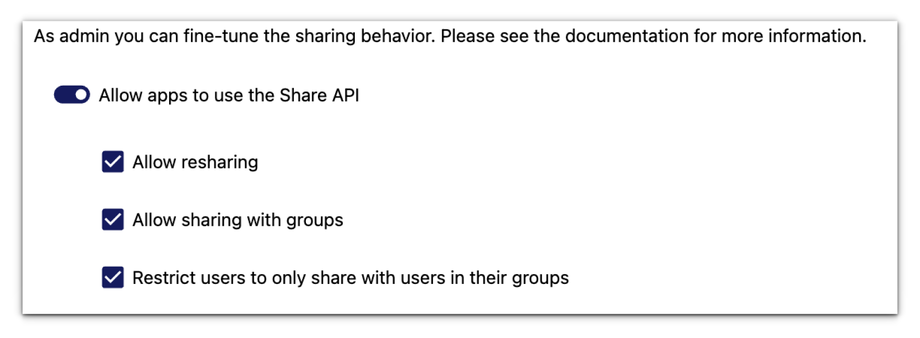
Allow apps to use the Share API.
Check Allow apps to use the Share API to enable users to share files. If this is not checked, no users can create file shares.
Check Allow resharing to enable users to re-share files shared with them.
Check Allow sharing with groups to enable users to share with groups.
Check Restrict users to only share with users in their groups to confine sharing within group memberships.
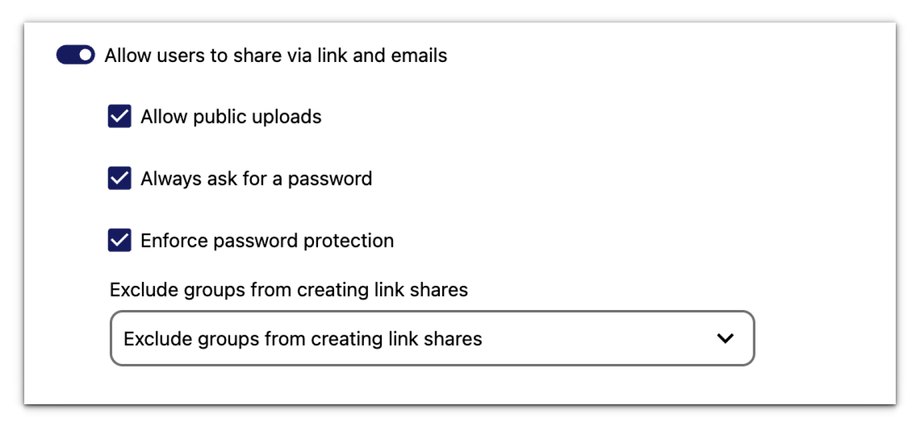
Allow Users to share via link and email
Check Allow users to share via link and email to enable creating public shares for people who are not Nextcloud users via hyperlink.
Check Allow public uploads to allow anyone to upload files to public shares.
Check Always ask for a password to proactively ask a user to set a password for a share link.
Check Enforce password protection to force users to set a password on all public share links. This does not apply to local user and group shares.
Add groups to Exclude groups from creating link shares or do not apply the settings for those groups.
How to Configure Default Expiration Date for Shares
The Set Default Expiration Date for Shares setting allows administrators to automatically apply an expiration date to all new file shares. This helps ensure that shared files are not accessible indefinitely, enhancing security by reducing the risk of forgotten or unattended shares remaining active.
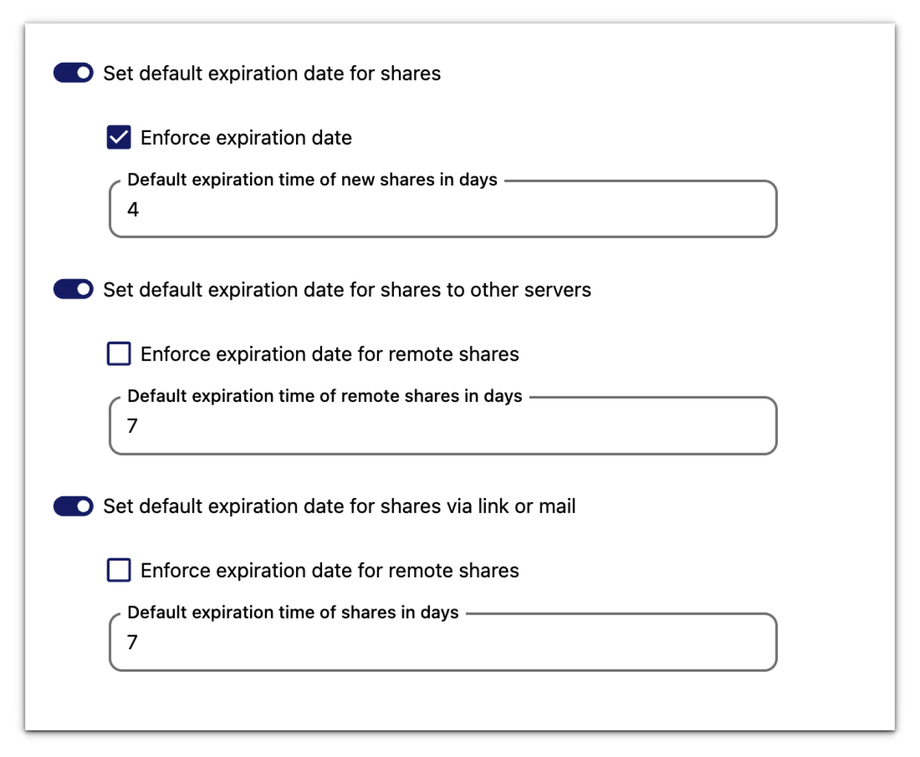
Set Default Expiration Date for Shares
This setting allows you to define a default expiration period for all new shares created by users.
When enabled, this setting ensures that all new shares created by users will automatically expire after the specified number of days. Users cannot override this expiration date. Enter the number of days after which new shares will expire by default. For example, if you set this to 4 days, any new share created will automatically expire 4 days after its creation.
Set Default Expiration Date for Shares to Other Servers
This setting allows you to specify a default expiration period for shares that are sent to other servers.
When the expiration date for remote shares is enforced, all shares sent to other servers will automatically expire after the specified number of days, and users cannot change this expiration date.
Set Default Expiration Date for Shares via Link or Mail
This setting allows you to define a default expiration period for shares that are created via links or email.
When the expiration date for remote shares is enforced, all shares created via links or email will automatically expire after the specified number of days, and users cannot override this expiration date.


